THE NIBBLE BLOG: Products, Recipes & Trends In Specialty Foods


Also visit our main website, TheNibble.com.


TIP OF THE DAY: Tofu Bean Chili For National Chili Day


Bean chili with cubes of tofu. Photo
courtesy House Foods America.
 

Today is National Chili Day. Chili has long been the subject of passionate debate:

Texas-style or Mexican? Beef only, meat and beans or beans-only-vegetarian? With tomatoes or without? Spiced with cumin? With a dash of chocolate or coffee? Served plain or over rice? Et cetera, et cetera and so forth.

Whatever your preferences, today is the day to enjoy a steaming bowl of chili. Make it with beans: Americans eat too few bean dishes, and beans are such an important, inexpensive and nutritious source of protein.

For even more protein and texture, add tofu. You’ll have a delicious dish that’s high in protein and low in fat.

We adapted this recipe from House Foods America, America’s leading purveyor of tofu, which is non-GMO verified and made from certified organic soybeans.


TOFU BEAN CHILI RECIPE

We like the medey of three different types of beans, but if you only have one or two on hand, that’s O.K., too.

Ingredients

  • 1 package extra firm tofu, drained, cut into small dice
  • 1 tablespoon olive oil
  • 1/2 cup onion, chopped
  • 1 bell pepper, seeded, small dice
  • ½ teaspoon minced garlic
  • 2 tablespoons chili powder
  • 1 teaspoon cumin
  • ½ teaspoon ground cinnamon
  • 1 can (16 ounces) black beans
  • 1 can (16 ounces) kidney beans
  • 1 can (16 ounces) pinto beans
  • 1 can diced tomatoes, drained,* or tomato sauce
  • ½ cup vegetable broth
  • Dash paprika
  • Salt and pepper to taste
  • Optional: 1 jalapeño, seeded and minced, or 1/2 teaspoon Worcestershire sauce
  • Optional: 1 can corn, drained*
  • Optional: 1 teaspoon brown sugar
  • Garnishes: chopped green onions or snipped chives, nonfat Greek yogurt or sour cream, shredded Cheddar
  •  
    *We like to save the drained liquid and use it instead of water in other recipes. It adds more flavor, but you may need to add less salt to the recipe because of the salt already in the canned vegetable liquid.


    Preparation

    1. HEAT olive oil in a large pot. Add onion and garlic and bell pepper and sauté until tender.

    2. ADD remaining ingredients except tomatoes and tofu, stirring to combine.

    3. ADD tomatoes and simmer for 10 minutes.

    4. ADD tofu and cook an additional minute or two until heated. Serve plain or with rice or other grain.

    VARIATION: For a more soup-like dish, add a cup or two of tomato juice or broth.
     
    QUICK RECIPE WITH CANNED CHILI

    If you don’t have a lot of time, start with canned chili.

    Ingredients

  • 1/2 pkg (7 ounces) extra firm or firm tofu, drained and crumbled
  • 1 can (15 ounces) chili beans or low-fat chili
  • 1-1/2 teaspoons chili powder
  • 1 teaspoon garlic powder
  • Garnish: 1/3 cup chopped green onions
  •  
    Enjoy chili plain or with a garnish of sour cream and chives or grated Cheddar. Photo courtesy McCormick.com.
     

    Preparation

    1. COMBINE ingredients in a pot and heat.

    2. GARNISH and serve.
      

    Comments off

    TIP OF THE DAY: Gourmet Condiments, Part 2


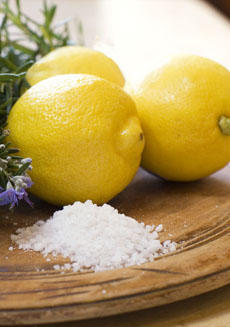
    Make your own citrus salt: You’ll want to
    use it on everything! Photo courtesy
    CookingSF.com.
     

    Yesterday we presented the first five recipes, mixing common condiments—balsamic vinegar, honey, maple syrup, mayonnaise and mustard—to create gourmet condiments. When you combine two condiments, the whole is greater (and more delicious) than the sum of its parts. Today we conclude chef Johnny Gnall’s lesson on combining condiments. If you have questions or suggestions for tips, email Chef Johnny.
    CITRUS ZEST + SALT OR SUGAR =
    FUN FINISHING SALT

    Here we create citrus salt, a great ingredient to have fun with because you can make it in advance, store it in an airtight container and use it as a flourish any time you want to kick up a dish. You can also give your homemade citrus salt as gifts to friends who like to cook.

  • Zest your favorite citrus onto a baking sheet. Spread it out so it doesn’t clump up.
  •  

  • Preheat the oven to 170°F, then turn it off (yes, turn it off) and place the baking sheet in the oven. Keep an eye on it, as you want to leave it in there just until the zest has dried. You don’t want to see any color change: This indicates caramelization, which changes the flavor; and the finished product doesn’t come out as nicely.
  •  
    How long in the oven? The timing will vary depending on the zest, your oven, the altitude, etc, but it shouldn’t take more than a few minutes. Once the zest has cooled, simply mix with salt or sugar and voilà! Now you have your own homemade infused salt (or sugar).

    Adjust the amount of zest to your preference for the condiment’s intensity, and use to finish fish, meats, or anything that could use some brightening up (start with eggs at breakfast, salad and soup at lunch, and whatever you’re serving for dinner). You can use lime finishing salt to rim a Margarita and a sweet finishing salt to rim a Lemon Drop or other cocktail.

    The sweet citrus condiment (sugar instead of salt) can be used to finish baked goods (sprinkle atop icing or plain loaf cakes) and rim cocktails. It makes a snazzy table condiment for parties.

    DRINKS + HEAT = REDUCTION = DRIZZLING SYRUP

    For Thanksgiving, I reduced Bundaberg ginger beer (which is my absolute favorite brand) and drizzled it over caramelized Brussels sprouts, and they stole the show. (I’ll reprise the recipe for Easter.)

  • You can make a reduction with anything from fruit juice to soda to stock to beer or wine.
  • You generally want to reduce the liquid to somewhere between one fourth to one half of its original volume, so be sure to start out with enough liquid so that you end up with the amount of syrup you need.
  • Just how thick in texture and concentrated in flavor your syrup will be is in your control, so taste it once you’ve gotten to about half of the original volume, to get a sense of its intensity. If it gets too thick or too strong in flavor (which often ends up meaning it tastes super sweet or super salty), no problem: Just add water.
  •  


    MOLASSES + RED WINE VINEGAR =
    MAGIC MEAT MARINADE

    Molasses adds great depth of flavor while the vinegar has enough punch to hold its weight at the other end of the flavor spectrum. The result is a balance that complements pork particularly well, but also goes nicely with beef or lamb, and is excellent on salmon.

    Be sure to season your meat generously with salt and pepper, as this is a powerful marinade and needs the salty element to hold its weight on your palate.

    Since a little can go a long way, you may decide to soften and stretch the marinade by whisking in a little olive oil.
    ROASTED GARLIC + OLIVE OIL =
    GARLIC “BUTTER”

    By applying a little heat to a head of garlic and using the right kitchen tool, you can create a delicious, fragrant condiment with sweetness and depth that will surprise you.

     
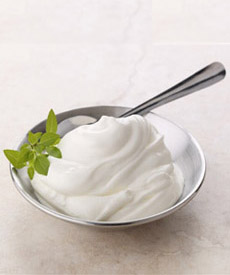
    Sour cream mixed with Dijon mustard makes Chef Johnny’s favorite sauce. Photo courtesy Wisconsin Milk Marketing Board.
  • Start by taking a whole head of garlic and making a horizontal cut about an inch above the bottom, through the thickest part of the head. Stop just before you slice all the way through, in order to leave a hinge. You should be able to see a cross section of all the cloves cut more or less in half.
  • Now rub olive oil generously all over both halves, inside and outsides (the oil helps to absorb the heat evenly). Put them back together, wrap in foil and bake at 425°F for about 45 minutes or until all the cloves are soft and brown.
  • Let cool, then squeeze each half from the ends like a tube of toothpaste to extract the garlic.
  • At this point, you can whisk the roasted garlic paste into olive oil with a wire whisk or a fork; you can also put it in a blender or food processor to “emulsify” with oil or do the same with a mortar and pestle.
  •  
    The quantities of oil and garlic will naturally affect the thickness of the condiment, as well as its flavor concentration; I like the ratio of about ¾ cups of oil to the average head of garlic. Don’t forget to season, and, as always, feel free to embellish with add-ins like chilies, dried herbs or spices.
    SOUR CREAM + DIJON MUSTARD = MY FAVORITE SAUCE

    At least once every couple of weeks when I want a quick and easy side for dinner, I simply slice whatever vegetable I happen to find in my fridge and sauté it.

  • Just as it’s finishing cooking, I drop a dollop or two of sour cream and a generous spoonful of Dijon mustard into the pan.
  • Season with salt and pepper and stir while the veggies finish cooking like this and the sauce will reduce just a bit and cling to everything beautifully.
  •  
    The combination of rich and tangy is to die for, and the whole is absolutely greater than the sum of its two parts; it’s familiar and different at the same time and it goes with anything!
     
    FIND OUR FAVORITE CONDIMENTS & RECIPES IN OUR GOURMET CONDIMENTS SECTION.
      

    Comments off

    EVENT: NYC Kids’ Food Festival This Weekend


    Kids will discover that healthful foods are
    exciting. Image courtesy Kids Food Festival.


    Last November, Hurricane Sandy caused the cancellation of the Kids’ Food Festival in New York City. But if you’ve been wondering what to do with the kids this weekend, put it on the calendar!

    It’s tough to get kids to establish healthful eating habits. Aside from all the media messages, there’s peer pressure and the ubiquity of not-good-for-you food and beverage choices.

    But what if good eating could be presented as a fun activity? That’s what Cricket Azima, kids food expert and founder of The Creative Kitchen, thought when she designed the Kids Food Festival.

    Now in its second year, in partnership with Cooking Light, the festival is a weekend full of good-for-you, flavorful fun held in Manhattan’s Bryant Park (42nd Street and Avenue Of The Americas) on March 2nd and 3rd.


    WHAT IS THE KIDS FOOD FESTIVAL?

    The Kids Food Festival is a celebration to educate families about making balanced food choices. This helps to create wholesome lifelong eating habits for both kids and parents.

    The event’s mission is to prevent or combat childhood obesity by engaging families in fun food activities, tastings and exciting family-friendly programming.

    The weekend-long event offers a host of family-friendly activities including cooking classes, food demonstrations and sampling, live entertainment, the Balanced Plate Scavenger Hunt for kids, giveaways and more. General admission to the event is free and open to the public, but tickets are required for the kids’ cooking classes, curated by the James Beard Foundation.
    COOKING CLASSES FOR KIDS

    Some of New York’s top chefs will provide hands-on cooking classes for kids at The James Beard Foundation Future Foodies Pavilion. Classes are $25 per child with a portion of the proceeds benefiting FoodCorps, a nationwide team of folks who connect kids to real food and help them grow up healthy. Tickets can be purchased here.

    WANT A KIDS FOOD FESTIVAL IN YOUR AREA?

    If you’re not in the New York Area, the Kids Food Festival can come to you. Contact @CricketAzima on Twitter or use the Contact Us form on the Festival website for information.

    You can follow the festival on Twitter @KidsFoodFestNYC and on Facebook and the Festival’s website.


    Comments off

    TIP OF THE DAY: Combine Condiments Into “Gourmet Condiments,” Part 1

    Today and tomorrow, chef Johnny Gnall takes on condiments: how your cooking can soar to greater heights by combining condiments in non-traditional ways. We got a lot of inspiration from his suggestions! Email your comments and suggestions for tips of the day to Chef Johnny.

    You’re about to discover how to take your favorite condiments—ketchup, maple syrup, mayonnaise, whatever you have at hand—and combine them in ways that make them even more delicious.

    Last May, when I reviewed The Flavor Bible, I talked about what I call “guerilla cooking.” Guerilla cooking is what being a chef should be all about: taking whatever ingredients are thrown at you, no matter how seemingly incompatible or mismatched they appear, and turning them into dinner. The meal doesn’t always fall under a specific cuisine or stay inside the culinary box, but with skill and knowledge, anything edible can be turned into a tasty treat (anyone who has watched an episode of Chopped knows this is true).


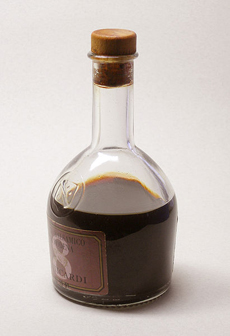
    Combine balsamic vinegar with soy sauce? Who’d have thunk it? Photo by Rainer Zenz | Wikimedia.


    COMBINE CONDIMENTS INTO A GREAT MEAL

    Another key to the process of turning odds and ends into an exceptional meal is knowing how to maximize the potential of the common ingredients you have in your fridge or pantry.

    Take the condiments group, a large set of ingredients bursting with opportunity. Anyone can drizzle truffle oil over potatoes to take things to the next level, but that’s so easy it’s almost cheating. Having the eye to spot a bottle, jar or can of something everyday and the imagination to apply it in an unexpected way can lead to signature dishes and great recipes that you never even knew were possible.

    Here are a few not-so-everyday combinations and applications for ingredients you have in your kitchen right now. Use them as a jumping off point, but remember that the real magic will happen when you come up with something brand new and completely your own. Mix away!

    BALSAMIC VINEGAR + SOY SAUCE = RICH, BALANCED UMAMI

    These two ingredients are a match made in heaven: one intense and sweet, the other intense and salty, both rich and velvety and bold and overflowing with umami and tannins.

    Add this combination to pretty much any vegetable and cook it however you like: The result will blow your mind.

    To get the amounts right, whisk the two together first (before adding to veggies), adding each in small amounts until you achieve balance. A few grinds of cracked pepper or a pinch of chili flakes add even more zing.

    Bear in mind, the better the quality of each ingredient, the richer and thicker your final product will be. The flavors will be there no matter what, but if you happen to have some of the good balsamic in your pantry, bust it out for this one. In addition to flavor, it will cling better to ingredients.

    And use a good soy sauce—not the packets that come with Chinese food take-out.


    Mix naple syrup and grainy mustard?
    Magnificent! Photo by Arpad Benedek | IST.
     

    HONEY + CHILI PASTE OR HOT SAUCE =
    DELICIOUS DIP

    Whether you’re dipping French fries, crudités, or chicken tenders, this sweet and hot combination is a true crowd pleaser. You may need to season with a little salt or soy sauce depending on what kind of chili paste or hot sauce you use, so test a dab before applying it.

    You can go naughty and thicken the sauce with a little sour cream, or add depth with a few drops of sesame oil. You can also stir in fresh herbs or citrus zest to brighten things up.

    MAPLE SYRUP + WHOLE GRAIN MUSTARD =
    FINGER LICKIN’ CHICKEN

    This is an easy one and it blows minds every time. A variation on honey mustard, the maple syrup delivers deeper flavor, and the whole grain mustard adds texture as well as clinginess.

  • Mix the two together in roughly equal amounts, or until you have a paste that will stick to a chicken without sliding off.
  •  

  • Season said chicken generously with salt and pepper first. This step is important as the sweet, tangy dressing needs the salt to help it achieve balance.
  • Then slather the chicken all over with the maple-mustard mix, and roast it on a rack at 350°F for 30 to 35 minutes, until its internal temp reaches 160°F.
  • Make sure to rest the chicken for 10-15 minutes after it comes out of the oven, before slicing into it. Resting allows the cooking process to finish and retains the juices, which otherwise flow out of a non-rested roast.
  • Then cut into pieces and get the Wet-Naps ready!
  •  
    MAYONNAISE + ANYTHING = GOOD

    Mayonnaise is just so darn versatile: The version we know today was invented by the brilliant French chef Marie-Antoine Carême (1784-1833), founder of the concept of haute cuisine (here’s the history of mayonnaise). The key with mayo is to not go overboard on quantity and turn it into a cholesterol-fest.

  • Whisk in some raw garlic and a drizzle of olive oil to turn it into aïoli; add a generous spoonful of smoked paprika and you have a killer condiment for roasted potatoes that is not far from Spain’s patatas bravas*.
  • Throw in some fresh chopped herbs, some lemon zest, a pinch of salt, and a few grinds of fresh pepper and you will take your sandwiches to a whole new level.
  • Just remember that mayonnaise is rich, so any ingredient you combine should be complementary. Bright flavors, acidity and spice are all excellent foils for richness, so you aim your combinations in those directions.
  •  
    TOMORROW: How to combine citrus zest, molasses, pickling liquid, sour cream, tomato paste and more into gourmet condiments.

    FIND OUR FAVORITE CONDIMENTS & RECIPES IN OUR GOURMET CONDIMENTS SECTION.

    *A tapas bar favorite, patatas bravas (also called patatas a la brava or papas bravas) is made from white potatoes that have been cut into small, irregular shapes, then fried in oil and served warm with a very spicy mayonnaise or tomato sauce.


    Comments off

    RECIPE: Espresso Mousse In Espresso Cups

    Pretty much every specialty dish, from “shrimp cocktail” coupes to Champagne flutes, can be used to serve something else. Take espresso cups: Use them to serve mini portions of soup, frozen desserts, or custards and mousse. For fun, make it espresso mousse.

    We came across a similar concept some 20 years ago, at the famed French Laundry restaurant in St. Helena, California.

    Chef Thomas Keller, who was very tongue-in-cheek back then, served a dessert called Coffee & Doughnuts: coffee mousse with a foam “cappuccino” top and a side of beignets. We loved it!

    In preparation for last night’s Academy Awards festivities, we got out the espresso cups and made espresso mousse (you can easily find recipes for chocolate-espresso mousse, like this one from Giada De Laurentiis).

    Espresso mousse is typically made with instant espresso powder, which you can use in all chocolate recipes. See the details below.


    [1] Multitasking espresso cups hold espresso mousse (photo © Filicori Zecchini).


    MOUSSE VERSUS POT DE CRÈME

    Some people don’t like the airy texture of mousse, which incorporates whipped egg whites and whipped cream for ethereal lightness. Pot de crème (poe-duh-CREHM, plural pots de crème) is a more dense alternative, with a texture similar to chocolate pudding (mousse means foam in French, pot de crème means pot of cream, referring to the small ceramic lidded dishes in which they are traditionally served).

    While we enjoyed the espresso mousse recipe below, for variety next time we’ll make espresso pots de crème.
     
     
    RECIPE: ESPRESSO MOUSSE

    You can make the mousse up to one day in advance.

    Ingredients

  • 1/2 teaspoon unflavored powdered gelatin
  • 4 large egg yolks
  • 1/4 cup granulated sugar
  • Pinch of salt
  • 2 cups cold heavy cream, plus 1 cup for the whipped cream
  • 2 tablespoons instant espresso powder
  • 1 tablespoon confectioners’ sugar
  • Optional: 1 ounce coffee or espresso liqueur
  • Optional garnish: Unsweetened cocoa powder (optional)
  • Optional garnishes: shaved chocolate, small cookie
  •  
    For Whipped Cream Garnish

  • 1/2 cup heavy cream
  • 1/2 teaspoon of vanilla or almond extract
  • 1-1/2 teaspoons confectioners’ sugar
  • Pinch salt
  •  


    [2] Espresso powder doesn’t make a great cup of espresso, but it truly enhances baked goods and other recipes (photo © Medagla d’Oro).
      Preparation

    1. SPRINKLE gelatin over 2 tablespoons of water in a cup or small bowl. In a medium bowl, whisk together egg yolks, sugar, and salt until the color turns pale (about 1 minute).

    2. HEAT 1 cup of the cream in a saucepan; whisk in espresso powder. Gradually whisk the cream mixture into the bowl of egg mixture; then add the new mixture to the saucepan.

    3. STIR constantly over medium heat until the mixture thickens (about 8 minutes). Transfer to a clean bowl and whisk in the gelatin mixture. Add in the optional coffee liqueur.

    4. PRESS plastic wrap onto the surface of the mixture and let it cool completely on the counter for about 45 minutes. Do not refrigerate.

    5. BEAT 1 cup of cream with an electric mixer until soft peaks form. Gently fold it into the espresso mixture. Divide among eight espresso cups (or six 4-ounce dishes), leaving an inch at the top to anchor the garnish.

     
    6. MAKE whipped cream. First chill the bowl, beaters, and cream thoroughly. Using an electric mixer, whip the cream, vanilla, and sugar in the chilled bowl until soft peaks form (makes about 1 cup).

    7. COVER and refrigerate until set, at least 1 hour. Top mousse with whipped cream and sprinkle with cocoa powder plus other optional garnishes, as desired.
     
     
    USES FOR ESPRESSO POWDER

    Like a pinch of salt, espresso powder enhances any chocolate recipe.

  • Use ½ teaspoon in baked goods: It enhances chocolate’s flavor without adding any coffee flavor.
  • Add one to two teaspoons to achieve a hit of espresso flavor in frostings and sauces. Dissolve the espresso powder in an equal amount of cream or water before adding it, to prevent unwanted coffee flecks.
  • For mocha flavor, use 2 teaspoons or more. Use half a teaspoon in any chocolate recipe for a subtle lift; a teaspoon or more brings out a mocha flavor.
  •  


    CHECK OUT WHAT’S HAPPENING ON OUR HOME PAGE, THENIBBLE.COM.


    Comments off

    The Nibble Webzine Of Food Adventures
    RSS
    Follow by Email


    © Copyright 2005-2024 Lifestyle Direct, Inc. All rights reserved. All images are copyrighted to their respective owners.