TIP OF THE DAY: Make Your Own Flavored Salt
|
Do you use flavored salt? Is your spice cabinet as packed with different flavors as ours is?
We have 10 jars of artisan* flavored salts, of which we often use just our three favorites (rosemary, saffron and truffle). The other seven take up a lot of space. It’s not that we don’t like them; it’s similar to shoes and clothing. We own a lot but wear the same three most of the time. It’s tempting to reach for yet another exciting artisan salt. Here’s some of what we see when we visit a specialty salt website like Saltopia or US Saltworks: Says Chef Eric LeVine: “One of the easiest ways to elevate your cooking to another level is to use flavored salts, or finishing salts. I call these ‘finishing salts’ because most of the time, its exactly what I use them for. No recipe is needed, really: Flavor + Salt = Flavored Salt. “I like to use these salts in place of regular salt. The flavor I use is dependent on either the type of dish I’m cooking, the ethnic cuisine or a flavor I would like to infuse into the dish. “Sometimes a dish just needs a little color after plating. A finishing salt is the perfect complement, flavor-wise and eye-candy-deliciousness-wise. Learn from professional cooks—who often serve food on white dinnerware—and sprinkle a bit of finishing salt directly on the food and the plate. The vibrant colors are shown off against the white and your dinner guests can dab as much as or as little of the salt [on their food] as they wish. You can make a batch for less than $1….or you could go to a gourmet shop and spend $12 for an itty bitty jar.” Spring and summer grilling are another reason to bring out the flavored salt instead of reaching for Morton’s Little Salt Girl or Diamond Crystal Kosher Salt. “You can also use it as a finishing salt. And you can use it to add a bit of color to all those beige and brown foods.” At THE NIBBLE, we use them as in ingredient or a garnish: |
|
|
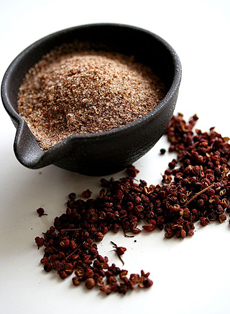
___________________________ *Artisan salts are flavored sea salts; as opposed to supermarket garlic salt, onion salt, etc., which are flavored table salts. It takes just five minutes to blend salt, herbs and spices in a spice grinder. You can make them on an as-needed basis, or make larger batches for your spice rack. At $13 and up retail for a 3.5-ounce jar, you can make your own for perhaps $1 a batch. Pick A Base Salt If you don’t have sea salt on hand, start with kosher salt or table salt. After you get the hang of blending, you can try more exotic salts, such as: Here are four recipes, two savory and two sweet. The first three are from Chef Eric; the Blueberry Salt is from THE NIBBLE archives. Dry-roasted Szechuan or Sichuan Peppercorn + food processor to grind the peppercorn + sea salt. Chef Eric roasted peppercorns in a hot, dry skillet until they were smoking but not burnt. Let it cool and add to a food processor or piece mill to grind to your preferred granule size. Then add the salt and pulse a couple of times to fully blend the flavors. Says Chef Eric: “I like my Szechuan pepper salt a little chunky and not like a fine powder, so I use equal amts of peppercorns and sea salt. You can adjust the proportions based on your tastes. If you are using a very fine sea salt or just regular table salt, decrease the amount of salt. “In addition to Asian-accent dishes or for a touch of heat, I also love seasoning my steaks with this salt prior to grilling, instead of the standard salt and pepper. It can also be served as a dipping salt for fried shrimp.” |
||
|
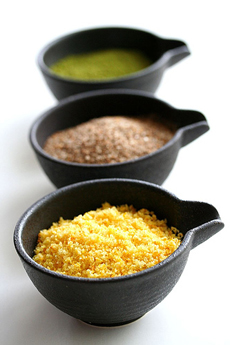
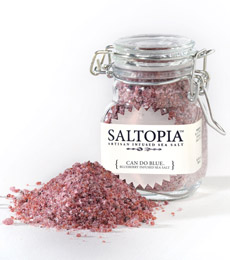
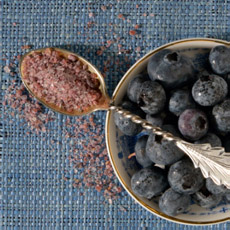
Recipe: Matcha Salt Matcha is Japanese green tea powder made from the highest quality of green tea leaves. It’s very different from simply grinding green tea leaves. It’s a stunning mossy green color, which makes such a pretty finishing salt. Matcha powder + sea salt + couple pulses in food processor if you are using coarse sea salt. Chef Eric likes to use it on a chocolate truffle or mousse; you can dip a plain chocolate bar dip in Matcha Salt. Use it with eggs and tofu, and with dishes that are light in texture and flavor, since this salt’s flavor is more delicate and subtle. “Don’t get the super-premium stuff,” says Chef Eric, “It would be a waste to use the expensive powder for the salts.” Peel any citrus and let the peels dry a little bit on a paper towel. Citrus salt is bright, cheery and light, says Chef Eric. “Finish your shrimp skewers, any vegetables, grilled chicken breasts or grilled salmon with Citrus Salt. Lighten your risotto or steamed rice.” For summer, make Blueberry Salt. Start with a small batch (this recipe makes one cup). This recipe takes longer, because you’re drying fresh fruit. Prep time is 35 minutes, cook time is 1 hour to 1 day, depending on whether you choose to oven dry (1 hour) or let dry naturally (24 hours or more). After you make this recipe, you can customize it with other ingredients: balsamic vinegar, citrus peel, thyme, rosemary or any of the ideas above. The recipe is courtesy of the U.S. Highbush Blueberry Council. |
|
|
|
1. LINE two baking sheets with parchment paper; set aside. 2. SIMMER the berries and water in a saucepan over medium heat until the berries pop and release their juices, about 5 minutes. Remove from the heat. 3. PRESS the blueberries with a potato masher or the back of a large spoon, reserving the juice. Further strain the berries with a fine wire sieve, pressing out as much liquid as possible; discard the solids. Line the sieve with cheesecloth and strain out the finer particles. 4. RETURN the juice to the saucepan. Bring to a boil and reduce to a simmer. Simmer (watching closely so the juice doesn’t burn) until the juice is reduced to a syrup thick enough to coat a spoon. You should have 2 to 3 tablespoons of juice. 5. REMOVE from the heat. Stir in the salt until the crystals are evenly coated, then spread the salt onto baking sheets. Let it air dry, stirring occasionally, until dry. This will take 4-24 hours, depending on the humidity. Alternatively, bake the salt in a 150° convection oven, stirring frequently until dry, about 1 hour. TIP: For a deeper purple salt, add food color to the blueberry juice in Step 4. Check out the different types of salt in our Salt Glossary. |
||
