RECIPE: Pecan Cheese Ball “Pine Cone” For The Holidays
|
Here’s some food fun for the holiday season—especially when you receive a gift tin of gourmet pecan halves! Not only does this cranberry cheese ball make an impression on the appetizer buffet, but it’s easy enough that you can let older children put it together as their contribution. The recipe is courtesy Sonia, who writes as The Healthy Foodie. She also does a version that looks like a pineapple. The day before, gather some pine branches to wash and dry. Why the day before? You don’t want the strong scent of fresh-cut pine wafting over the food. Then, get ready to make your pine cone cheese ball! Ingredients |
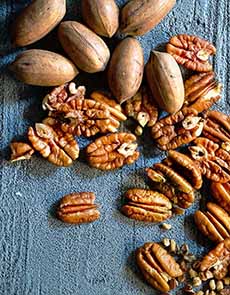
 [1] A seasonal cheese ball made to look like a pine cone (photos #1 and #3 © The Healthy Foodie).
|
|
 [3] Add some fresh evergreen for the full pine cone experience. |
Preparation
1. WHIP the cream cheese and sour cream using an electric mixer or a stand mixer with the paddle attachment. Use medium speed until well incorporated—smooth and creamy in texture—about 2-3 minutes. Incorporate the rest of the ingredients and continue mixing on low speed until well combined, about 30-45 seconds. 2. TURN the mixture onto a serving plate and shape into a teardrop. Cover with a plastic wrap and, ideally, refrigerate until the next day. This will allow the flavors to fully develop. 3. WAIT until the last minute to cover with the pecans to avoid them going soft. Take the cream cheese “ball” out of the fridge about an hour before you are ready to start laying on the pecans. Pecans will stick better to cheese that is closer to room temperature. |
|
|
4. BEGIN to layer the pecan halves at the tip and keep shingling until you get to the top. The first rows will lay flat against the cheese but they will be more and more upright as you move towards the end. This will happen naturally. Just keep them nice and tight and use the best pecans you can find. 5. DECORATE the serving dish with a few pine branches and serve with the crackers or bread. |
||

