THE NIBBLE BLOG: Products, Recipes & Trends In Specialty Foods


Also visit our main website, TheNibble.com.

Detroit Greek Salad Recipe & The Different Types Of Greek Salad

 
Detroit Greek Salad
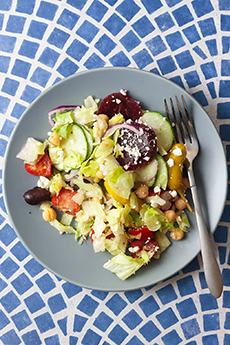
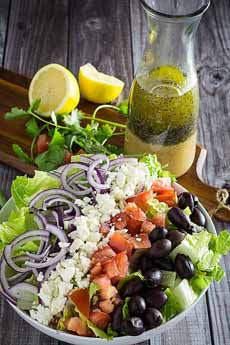
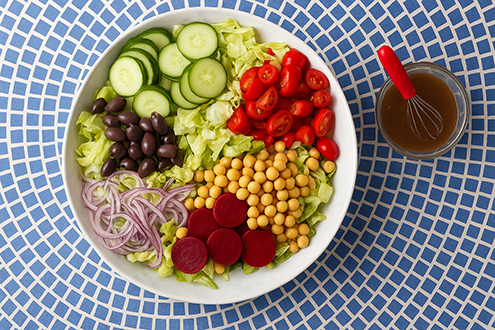
[1] The Detroit Greek Salad, with beets and chickpeas (photo © Sarah Tramonte | Taste Of Home).

A pitcher of Detroit Pink Greek Salad Dressing
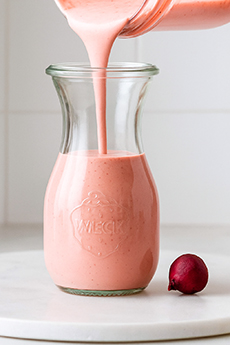
[2] Detroit’s Famous Pink Greek Dressing. The color comes from beet juice, which you can use from the can of beets or buy by the bottle (our favorite brand is Biotta). The recipe is below (A.I. photo).

Chickpeas & Beets For Detroit Greek Salad
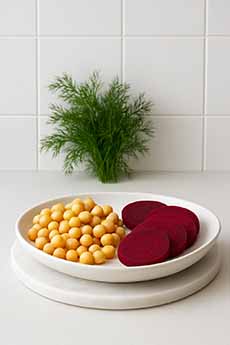
[3] The addition of chickpeas and beets plus the pink Greek dressing [photo #2] distinguish the Detroit Greek Salad (photo A.I.).


[4] Combining a Greek salad with a quinoa and hummus bowl. Here’s the recipe (photo © Baked Greens).

Creative Greek Salad
[5] Creative plating (photo © Stix Restaurant | NYC).

Greek Cobb Salad
[6] More creative plating: Lay out the ingredients like a Cobb salad. Here’s the recipe (photo © Dishing Delish).

Grilled Seabass Atop Greek Salad
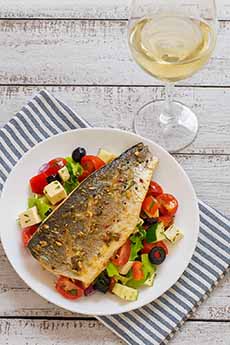
[7] Top a Greek salad with your favorite protein, here seabass a.k.a. branzino (A.I. photo).

Avocado-Stuffed Greek Salad
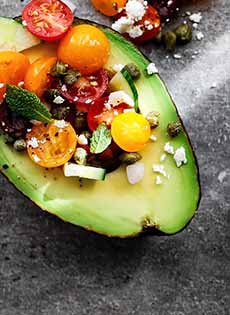
[8] Avocado stuffed with Greek Salad. Here’s the recipe (photo © Avocados From Chile).

Spiralized Greek Salad
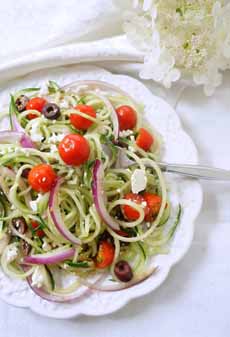
[9] Greek salad with spiralized cucumbers. Here’s the recipe (photo © Pampered Chef).

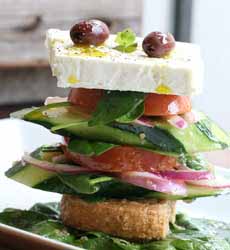
Vertical (Stacked) Greek Salad
[10] Have fun with it: Turn the ingredients into a Stacked Greek Salad (photo © Death Ave | NYC).

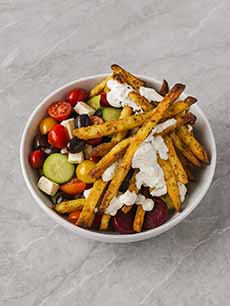
Greek Salad Topped With French Fries
[11] Another fun idea, from the Idaho Potato Commission: Top a Greek salad with Greek-seasoned fries and tzatziki sauce. Here’s the recipe (photo © Idaho Potato Commission).

 vz
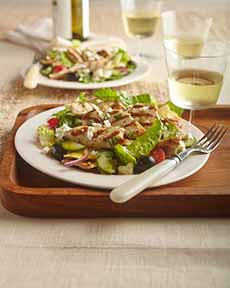
[16] Top a Greek salad with grilled chicken. Here’s the recipe (photo © Discover California Wines).

   
There are 30 cheese holidays each year, but feta isn’t one of them. There are 40+ salad holidays, but no Greek Salad Day.

So we’re honoring one of our favorite salads with lots of creative Greek salad recipes, starting with Detroit’s version. The recipe is below, as well as:

> The history of Greek salad.

> American Greek salad vs. horiatiki: a comparison chart.

> The authentic salads of Greece.

> Links to more Greek salad recipes, below as well as in the photos.

> The history of salad.
 
 
SURPRISE: AMERICA’S GREEK SALAD IS NOT GREEK!

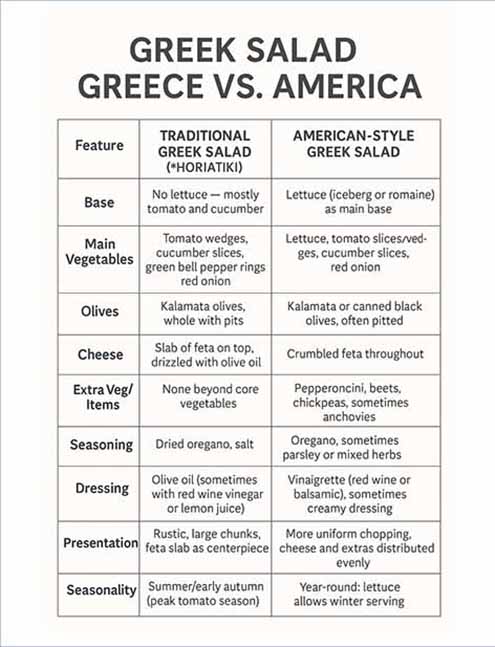
Point of information: The ubiquitous salad in restaurants nationwide is the American Greek salad. See image #14 for the difference between the Americanized Greek salad and the horiatiki you’ll find at Greek restaurants.

  • In Greece, lettuce is rarely if ever included in a horiatiki.
  • There is a Greek lettuce salad called maroulosalata, but it’s essentially lettuce with dill and feta. Here’s a recipe.
  •  
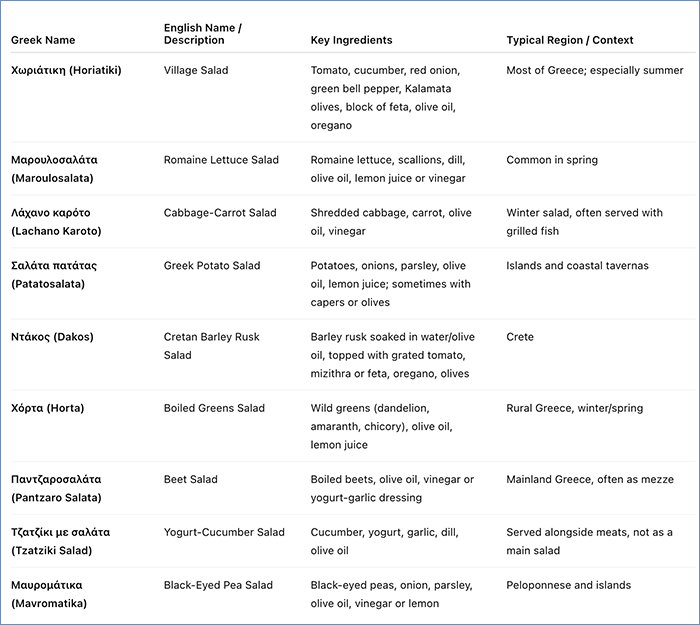
    Just as in any other country, there are different types of salads. See image #15 below for the different types of authentic Greek salads and their ingredients.

    So who created the “American” Greek salad?

    The American-style Greek salad—with a lettuce base, pepperoncini, olives, feta, and a red wine vinaigrette—evolved organically in Greek-owned diners and restaurants across the U.S., particularly in cities with large Greek immigrant communities such as Chicago, Detroit, and New York.
     
     
    HISTORY OF THE GREEK SALAD IN AMERICA

  • Pre-20th century: Horiatiki, “village salad,” had long existed as a seasonal summer dish. It’s composed of tomatoes, cucumber, onion, bell pepper, olives, a slab of feta cheese, olive oil, and oregano. But no lettuce: Lettuce was not commonly grown in rural Greece.
  • 1890s–1920s: The first major wave of Greek immigration arrives in the U.S. Many immigrants open small restaurants, coffeehouses (kafeneia), and later, diners.
  • 1920s–1940s: Greek-owned diners become popular, especially in the Northeast and Midwest. Menus were adapted to American tastes.
  • 1950s–1960s: Since “salad” in the U.S. implied lettuce, Greek-American diners began serving “Greek salad” with a lettuce base to horiatiki ingredients, plus extras like pepperoncini and sometimes, anchovies and chickpeas. The feta was crumbled, enabling even distribution throughout a tossed salad (and a savings on the net weight of the feta). Vinaigrettes replaced simple olive oil/lemon dressing. With a base of inexpensive lettuce, the Greek salad became a hearty entrée salad instead of a side, like horiatiki.
  • 1970s–1980s: “Greek salad” became firmly established as a diner and pizzeria staple across the U.S.,Lettuce allows year-round service and larger portions.
  • 1990s forward: Upscale Greek restaurants proliferated, with chefs putting their own spins onto the “classic Greek salad.”
  •  
     
    RECIPE: DETROIT GREEK SALAD

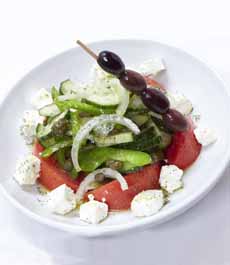
    A conventional Greek salad (which is an American adaptation—see below) has lettuce, feta, cucumbers, tomatoes, Kalamata olives, and hopefully a couple of pepperoncini and a stuffed grape leaf or two (dolmades). The dressing is olive oil and red wine vinegar.

    Why is this one called a Detroit Greek Salad?

    It has all of the conventional Greek salad ingredients, plus a few extras: chickpeas and pickled beets.

    At the turn of the 20th century, many Greek immigrants settled in the Detroit area and established businesses and restaurants in a neighborhood that is now known as Greektown. The diners served a variation of the classic Greek salad, which became known as the Detroit Greek salad.

    In Detroit, the salad is topped with the Detroit-famous pink Greek dressing (photo #2), which is mayonnaise-based. We include that recipe, along with the classic red wine vinaigrette should you prefer it (we do).

    In fact, authentic Greek salad dressings are always simple, usually just olive oil, vinegar or lemon juice, salt, and oregano.

    Plus, the crumbled feta in the recipe is an American substitution. When feta cheese is served with a salad in Greece, it is as a slab, not crumbled.

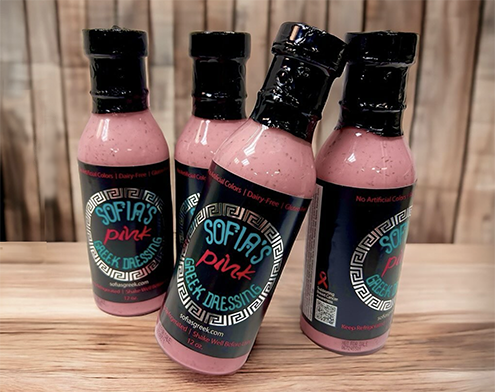
    Back to the dressing: Sofia’s Famous Pink Greek Dressing is largely sold in the Midwest, but is available online (photo #13).

    The salad is delicious for lunch or dinner as a side, or as a main course with, perhaps, strips of lamb, chicken (photo #16, or a filet of grilled or baked fish (photo #7).

    We happened to have a ripe avocado on hand and added it along with a bag of mostly-crushed Stacey’s Pita Chips in the manner of the Lebanese fattoush† salad.

    Prep time is 20 minutes.

    Thanks to Taste Of Home for the recipe. It was submitted by Susan Bronson of Rhinelander, Wisconsin and tested by the Taste of Home Test Kitchen.
     
    Ingredients For 8 Servings

    For The Detroit Pink Greek Dressing

  • 3/4 cup olive oil-based mayonnaise
  • 3/4 cup milk
  • 1/2 cup beet juice
  • 1/2 cup crumbled feta
  • 1/4 cup olive oil
  • 2 tablespoons red wine vinegar
  • 1 tablespoon chopped fresh dill
  • 1 teaspoon sugar
  • 1 teaspoon dried oregano
  • 1/8 teaspoon garlic powder
  • Salt and pepper to taste
  •  
    For The Red Wine Vinaigrette

  • 1/4 cup olive oil
  • 3 tablespoons red wine vinegar
  • 1/4 teaspoon salt
  • 1/4 teaspoon dried oregano
  • 1/8 teaspoon pepper
  •  
    For The Salad

  • 8 cups chopped iceberg lettuce
  • 1 cup sliced English cucumber
  • 1 cup grape tomatoes, halved
  • 1/2 cup thinly sliced red onion
  • 1 can (15-1/2 ounces) no-salt-added chickpeas (garbanzo beans), rinsed and drained
  • 1 cup whole pitted Kalamata olives
  • 1 cup crumbled feta cheese
  • 1/2 cup pickled sliced beets
  • 8 whole pepperoncini
  •  
    Optional For Serving

  • Pita wedges, plain or toasted
  • Pita chips
  •  
    Ready to toss Detroit Greek Salad
    [12] Ready to toss and add the feta. You don’t need to toss it. Consider serving your Greek Salad in the Cobb Salad style (photo #6).
     
    Preparation

    1. MAKE the dressing. For the Greek Pink Dressing, add all ingredients to a food processor or blender, and blend on high until throughly combined. Chill until ready to serve. For the vinaigrette, in a small bowl, whisk together olive oil, vinegar, salt, oregano, and pepper; set aside.

    2. PLACE the lettuce, cucumber, tomatoes, and onion in a large bowl. Add the chickpeas and olives; toss to combine.

    3. DRIZZLE the dressing over salad; toss to coat. Top with the crumbled feta, sliced beets and pepperoncini. Serve immediately.

    Note: To avoid soggy greens, don’t add the dressing until just before serving.

    If you have leftover salad that’s dressed, plan to use it the same day if possible.

  • Make crostini. Toast baguette slices, slather them with whipped feta* or Greek yogurt, and top each slice with a spoonful or two of Greek salad and dressing.
  • Make a Greek salad and hummus sandwich. Spread a layer of hummus onto a tortilla or pita pocket, then top it with the leftover Greek salad, drained.
  •  
    Bottles Of Sofia's Pink Greek Dressing
    [13] Sofia’s Pink Greek Dressing is largely sold in the Midwest, but you can purchase it online (photo © Sofia’s Greek).
     
     
    “AMERICAN” GREEK SALAD VS. GREEK HORIATIKI
    Greek Salad Ingredients Chart
    [14] Chart by A.I.


    MORE GREEK SALAD RECIPES

  • Chopped Greek Salad Sandwich
  • Classic Greek Salad
  • Greek Salad In A Waffle Cone
  • Greek Salad & Quinoa Bowl
  • Greek Salad Nachos
  • Greek Salad With Artichoke Hearts
  • Hummus Bowl With Greek Salad
  • Tuna Greek Salad Sandwich
  • Vegan Greek Salad
  •  
    Plus

  • 25 Feta Cheese Recipes
  • Homemade Pita
  •  
    THE DIFFERENT TYPES OF AUTHENTIC GREEK SALADS
     
    Chart Of Types Of Greek Salads
    [15] Greek cuisine has numerous types of salads, none of which is called “Greek salad.” That’s an American invention. Here’s what’s on the menu in Greece (A.I. chart).
     
    ________________
     
    *Whipped feta recipe: Place 8 ounces chopped feta in a food processor with a 4 ounces cream cheese, 1 clove sliced garlic, 2 tablespoons lemon juice, an optional 1/2 teaspoon grated lemon zest, and black pepper to taste. Pulse until completely combined. Stir in 2 tablespoons fresh chives.

    †Fattoush, a Middle Eastern bread salad that originated Lebanon, has become a staple throughout the Levant region. Like a horiatiki or Greek salad, it includes a medley of fresh vegetables, such as lettuce, cucumbers, tomatoes, bell peppers, and radishes. Fresh mint and parsley are commonly added. The defining feature of fattoush is the inclusion of toasted or fried pieces of pita bread, providing a unique texture and crunch. (Because pita is so thin, they’re much crunchier than regular bread croutons).


    CHECK OUT WHAT’S HAPPENING ON OUR HOME PAGE, THENIBBLE.COM.


    MORE TEXT


    Comments off

    Bakewell Tart Recipe For National Bakewell Tart Day

    August 11th is National Bakewell Tart Day, a fact which may lead most Americans to say, “What’s A Bakewell Tart?”

    It’s a traditional British pastry that originated in the town of Bakewell in Derbyshire, England. A layer of jam covers a shortbread crust, topped in turn by of almond custard (frangipane) and sliced almonds.

    It isn’t overly sweet, making it perfect for afternoon tea or even as a breakfast pastry. We think it’s pure comforting food.

    The jam can be virtually any flavor. In the newspaper reporting of the original “accident” (see the history, below the flavor wasn’t specified. The cook would have used whatever was on hand.

    Today’s Bakewell Tart typically uses cherry, raspberry, or strawberry jam. Use whatever you like.

    > The recipe follows.

    > The history of the Bakewell Tart is below.

    > The year’s 3 tart holidays are below. However…

    > There are 31 pie holidays!

    > The history of pie.

    > The difference between a pie and a tart.

    > The different types of pies and pastries: a photo glossary.

    > The history of dessert.

    > More history of dessert.


    RECIPE: BAKEWELL TART

    Prep time is 45 minutes and bake time is 45 minutes.

    While many recipes like a garnish of confectioners’ sugar, we leave it off—we don’t like it “dusting all over the place.”

    See the commentary in the *footnote about substituting marzipan for frangipane.
     
    Ingredients For 12 Servings

    For The Shortbread Crust

  • 2 cups all-purpose flour
  • 2 tablespoons granulated sugar
  • 1/2 teaspoon salt
  • 1/2 cup unsalted butter, frozen
  • 2 large egg yolks
  • 1/2 teaspoon almond extract
  • 1-2 tablespoons cold water
  •  
    For The Filling

  • 1 cup cherry or raspberry jam (preferably seedless)
  •  
    For The Frangipane

  • 9 tablespoons unsalted butter, room temperature
  • 1 cup plus 2 tablespoons confectioners’ sugar
  • 3 large eggs, room temperature
  • 1/2 teaspoon almond extract
  • 1-1/3 cups almond meal (not almond flour)
  • 1/4 cup all-purpose flour
  •  
    For The Garnish

  • 2 tablespoons confectioners’ sugar
  • 1/2 cup sliced almonds
  •  
    Preparation
     
    1. MAKE the crust. Whisk together the flour, sugar, and salt. Grate the frozen butter into the mixture and rub the butter into the flour, using your fingers or a pastry cutter, until the mixture resembles breadcrumbs.

    2. LIGHTLY BEAT the egg yolks with the almond extract and stir them into the flour mixture. Continue to mix while adding just enough water to form a sticky dough.

    3. ROLL out the dough on a lightly floured surface to 1/4-inch thickness. Transfer the dough to the tart pan, pressing along the sides and trimming any excess dough. Refrigerate for at least 30 minutes.

    4. PREHEAT the oven to 400°F. Place a circle of parchment paper on top of the dough and fill it with pie weights or dried beans and bake for 10 minutes. (This is called blind baking, to briefly pre-cook the shell before adding the filling, to ensure a crisp, fully cooked crust). Then…

    5. REMOVE then the pie weights and parchment paper and bake for an additional 5 minutes until just barely golden. Reduce the oven temperature to 375°F and set the crust aside to cool.

    6. MAKE the frangipane. Cream together the butter and sugar with an electric mixer on medium speed until light and fluffy, about 1 minute. Add the eggs, one at a time, beating well after each addition. Add the almond extract and beat for an additional 30 seconds. Spoon in the almond meal and all-purpose flour while the mixer is running and combine well.

    7. SPREAD 1 cup of jam evenly along the shortbread crust. Top with the frangipane, spreading to cover the entire surface of the tart. Smooth the top and bake at 375°F for 20 minutes.

    8. REMOVE the tart from the oven and scatter the sliced almonds across the top. Return to the oven and bake an additional 5-10 minutes, until golden brown and a tester inserted into the center of the tart comes out clean.

    9. DUST with additional confectioners’ sugar if desire and serve slightly warm or at room temperature with optional custard sauce or whipped cream.

    If not serving that day…

    10. TIGHTLY WRAP the tart or place it in an airtight container. If will keep on the counter for three days, or a few days longer in the fridge (allow to come to room temperature before serving).

    You can freeze a Bakewell tart for three months. Allow it to thaw in the fridge instead of on the counter. Before serving, take it out of the fridge and let it come to room temperature.
     
     
    THE HISTORY OF THE BAKEWELL TART

    The history off the Bakewell Tart begins with the creation of its predecessor, Bakewell Pudding (photos #1, #6, and #7). An origin story claims it was invented around 1820 by accident at the White Horse Inn (now the Rutland Arms Hotel) in Bakewell, Derbyshire (photo #8).

    What we do know is that a recipe for Bakewell Pudding appears in The Magazine of Domestic Economy, published in London in 1836. Another recipe is found in Eliza Acton’a 1845 book, Modern Cookery for Private Families.

    But there is a conflicting account from a contemporary bakery café in Bakewell.

    As The Old Original Bakewell Pudding Shop tells it, around 1860 a Mrs. Wilson became aware of the creation that at The White Horse Inn (which seems a bit late given the aforementioned recipes).

    The website also adds to the origin story, that a visiting noblemen had ordered a strawberry tart at The White Horse Inn, but instead of stirring the egg mixture into the pastry, the cook spread it on top of a layer of jam.

    The story goes on to say that Mrs. Wilson acquired the original recipe and started a business of her own.

    Oh, and some trivia: The name Bakewell doesn’t refer to a town where there are talented bakers. Rather, it’s derived from its Old English name, “Baedeca’s wella,” meaning Baedeca’s Springs.

    Likely, a Saxon named Baedeca or Beadeca first settled by the warm springs in the area. The name of the town is mentioned in a historical record dating back to 924 C.E.
     
     
    The Pudding Becomes A Tart

    The evolution to the modern Bakewell Tart with frangipane instead of custard filling occurred in the early 20th century, probably between 1900 and 1920.

    To our knowledge, no one has yet dug through early 20th-century British cookbooks and bakery records to find a printed record (although as with all recipes, it can have emerged long before it first appears in print).

    The transition was likely been gradual rather than a single moment of invention. It likely occurred because:

  • Frangipane is easier to work with than delicate egg custard.
  • The tart version had a longer shelf life.
  • It was more suitable for commercial production.
  •  
    The town of Bakewell still celebrates both versions, and the original Bakewell Pudding can be purchased at the Old Original Bakewell Pudding Shop, where they are served hot with custard or cream.
     
     
    THE YEAR’S 3 TART HOLIDAYS

  • June 17 or 18: National Cherry Tart Day†
  • August 11: National Bakewell Tart Day†
  • August 11: National Raspberry Tart Day†
  • December 9: National Pastry Day
  •  
    ________________
     
    *A proper Bakewell tart has a layer of raspberry jam topped with frangipane, which is almond cream made from ground almonds, butter, eggs, and sugar. The frangipane bakes into a light, cake-like texture that’s moist and tender. This is the classic version. Some bakers substitute marzipan: It’s also made from almonds and sugar, and when baked, it softens and creates an almond-flavored layer. But the texture and richness are quite different. Marzipan is denser, sweeter, and lacks the butter and eggs that give frangipane its characteristic richness and rise. A Bakewell made with marzipan would be chewier, more intensely almond-forward, and less cake-like—but for marzipan lovers, it can be a delightful switch: Not a substitute for frangipane, but an adaptation of the almond flavor.

    †The date is in dispute; some sources say June 17th, some say the 18th.


    Bakewell Pudding & Bakewell Tart, Cup Of Coffee
    [1] The Bakewell Tart is in the center, and its predecessor, Bakewell Pudding, is at the left. Both are still popular today (photos #1, #6, #7, and #9 © The Original Old Bakewell Pudding Shop | Facebook).

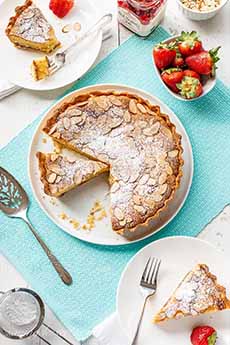
    A Bakewell Tart With A Slice Removed
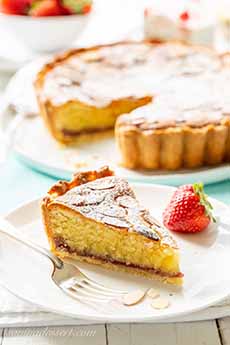
    [2] Here’s another recipe for the Bakewell Tart, showing an optional garnish of confectioners’ sugar (photos #2 and #3 © Saving Room For Dessert).

    Bakewell Tart Slice - Side View
    [3] A side view of showing the frangipane layer.

    Feathered Icing Bakewell Tart
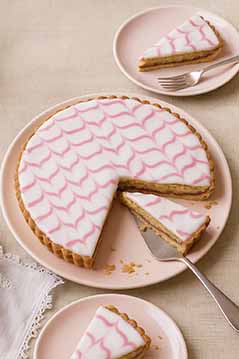
    [4] Modern pastry chefs have added some pizzazz to the Bakewell Tart, adding a boiled white icing. This version from Mary Berry shows a feathering effect atop the icing. Here’s the recipe (photo © BBC Food).

    Mini Bakewell Tarts
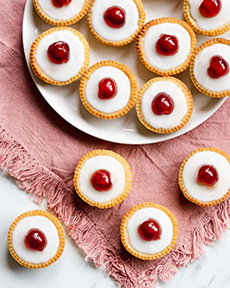
    [5] Pastry chefs have added similar pizzazz to Bakewell Tartlets (mini-tarts): boiled icing with a decorative dab of cherry jam on top. Here’s the recipe (photo © Movers & Bakers).

    Bakewell Pudding With Custard Sauce
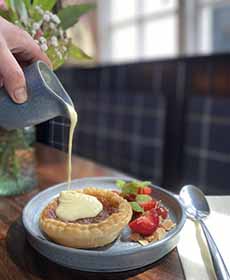
    [6] Warm custard sauce is the traditional garnish for Bakewell Pudding.

    Bakewell Pudding On White Plate
    [7] The proof of the pudding is in the eating.

    Rutland Arms Hotel
    [8] The Rutland Arms Hotel in Bakewell is the site of the original White Horse Inn, where Bakewell Pudding was created (photo © The Coaching Inn Group).

    Portrait Of Mrs. Wilson
    [9] Portrait of Mrs. Wilson, who “acquired” the recipe and began to sell Bakewell Pudding from her shop around 1860.


    CHECK OUT WHAT’S HAPPENING ON OUR HOME PAGE, THENIBBLE.COM.


    Comments off

    Recipes: Peach Sangria, Peach Sangria Popcorn & More Snacks

    Peach Sangria & Peach Sangria Popcorn

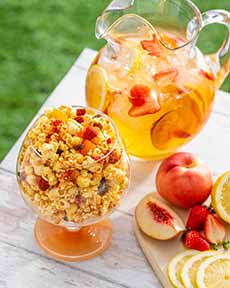
    [1] Peach sangria popcorn will likely be a new treat for your family and friends. The recipe is below (recipe and photo © Popcorn Board).

    Diced Dried Peaches
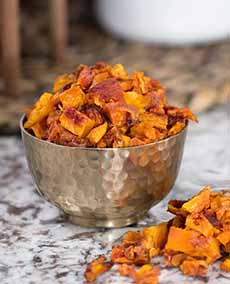
    [2] While the popcorn recipe doesn’t call for peaches (just peach jam), we had a supply of dried peaches and added them to the mix. They made a peachy-licious difference (photo © Bella Viva).

    A jar of Bonne Maman peach preserves
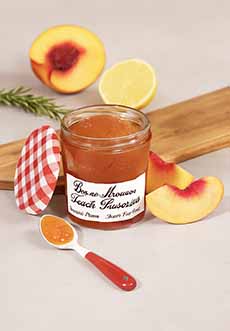
    [3] We served the rest of the peach preserves with fresh goat cheese (photo © Bonne Maman).

    Peach Sangria Recipe
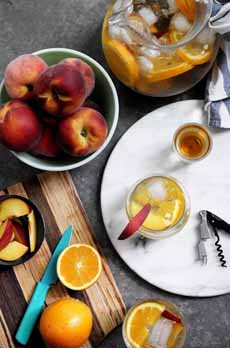
    [4] You can make peach sangria year-round with frozen peaches, but there’s nothing better than fresh summer peaches (photo © Sparkling Ice). Make it a mocktail sangria with flavored sparkling water. Sparkling Ice, for example, has Peach Lemonade and Peach Nectarine (photo © Sparkling Ice).

    Pitcher Of Peach Sangria

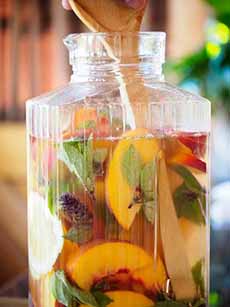
    [5] If you don’t have a glass pitcher, consider getting one so everyone can enjoy the “still life” inside (photo © Elegant Affairs Caterers).

    Whole & Sliced Peaches
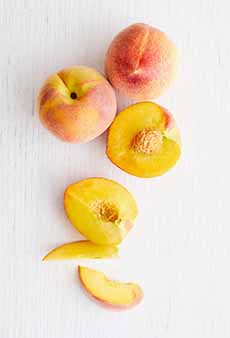
    [6] Make sure the peaches are ripe. They’ll be slightly soft to the touch with a bit of give when gently squeezed, and will have a sweet, fruity aroma (photo © Good Eggs).

    A bottle of Thatcher's Organic Peach Liqueur
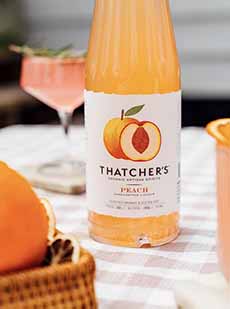
    [7] We have a bottle of wonderful artisan peach liqueur from Thatcher’s Organics. You can also use it in orange juice, lemonade, spritzes and cocktails. If you’re a liqueur fan, see the whole line (photo © Thatcher’s Organics).

    Watermelon Caprese Skewers
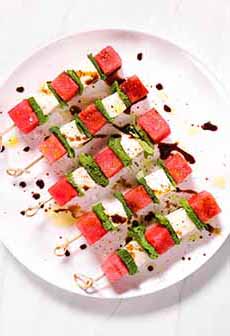
    [8] Add these skewers to the snack menu. Here’s the recipe. You can substitute feta for the mozzarella, and add a slice of prosciutto and/or a grape tomato if you like (photo © Dorothy Lane Market).


    Summer gives us wonderful stone fruits, but summer flies by. The off-season imports from the Southern Hemisphere can’t compare to local fruits from our farmers market.

    Here’s a tasty and fun entertaining idea: peach sangria with peach sangria popcorn.

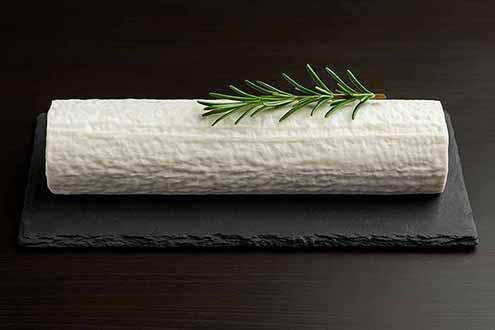
    For more of a snack, we served them with our favorite crackers, fresh goat cheese (photo #9), peach preserves, and kabobs of watermelon and mozzarella (substitute feta).

    For these additional snacks, see photos #8 and #9.
     
    > The history of peaches.

    > The history of sangria.

    > The history of popcorn.

    > The year’s peach holidays are below.
     
     
    RECIPE #1: PEACH SANGRIA POPCORN

    While this recipe from The Popcorn Board did not include dried peaches, we had a bag of delicious Bella Viva diced peaches on hand. We added them instead of the dried cranberries and raisins, but you can certainly add them in addition to those fruits..
     
    Ingredients

  • 8 cups popped popcorn
  • 1/4 cup chopped dried apricots
  • 1/4 cup dried cranberries
  • 1/4 cup raisins
  • 1/2 cup unsalted butter
  • 1/2 cup dry white wine
  • 1/3 cup peach jam
  • 1/3 cup granulated sugar
  • 1/4 cup corn syrup
  • 1/4 tsp salt
  • 1 tbsp lemon zest
  • 1 cup chopped freeze-dried strawberries (we substituted the dried peaches in photo #2)
  •  
    Preparation

    1. LINE a large baking sheet with parchment paper. Spray a large bowl with nonstick cooking spray.

    2. TRANSFER the popcorn to the prepared bowl. Toss in the dried peaches, dried apricots, cranberries, and raisins.

    3. MELT the butter in medium heavy-bottomed saucepan set over medium heat. Add the wine, jam, sugar, corn syrup and salt. Bring to a boil, stirring frequently, and cook for 12 to 15 minutes or until the sugar mixture is golden brown and has reached the hard-ball stage.

    (To test, add a few drops of sugar syrup to a glass of ice-cold water; if the sugar syrup solidifies, the mixture is ready.)

    4. STIR in the lemon zest. Working quickly and carefully, pour the caramel over the popcorn, stirring to evenly coat.

    5. ARRANGE the popcorn mixture on the baking sheet, spreading into an even layer. Sprinkle with freeze-dried strawberries. Let set until firm and cooled completely.
     
     
    RECIPE #2: PEACH SANGRIA WITH SCHNAPPS

    Ingredients For 6-8 Servings

  • 2 large fresh yellow peaches (about 1 pound), sliced
  • Other fruits of choice, e.g. orange slices, strawberries
  • 3/4 cup peach liqueur or peach schnapps (the difference—photo #7)
  • 1 bottle white wine*
  • 1 liter club soda, flavored club soda or ginger ale, chilled (substitute Prosecco)
  •  
    Preparation

    1. PLACE the peaches and other fruit in a pitcher, and add liqueur and wine. Stir and chill. When ready to serve…

    2. POUR the sangria into glasses; make sure each glass has a nice amount of fruit. Top off with the carbonated beverage; stir gently as desired.
     
     
    RECIPE #2: PEACH SANGRIA WITH PEACH VODKA

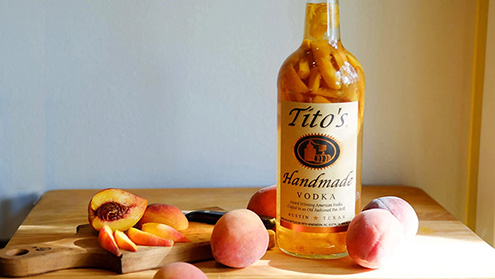
    If you don’t have peach vodka and don’t want to buy it, use regular vodka. If you like, you can infuse it with fresh peaches, 4-6 days in advance (see photo #10). You can also use gin or tequila.

    Prep time is 10 minutes, chilling time is 2+ hours. Adapted from All Recipes.

    Ingredients

  • 1 (750 ml) bottle dry white wine*
  • 3/4 cup peach flavored vodka (photo #10)
  • 6 tablespoons frozen lemonade concentrate, thawed
  • 1/4 cup table sugar
  • 1 pound white peaches, pitted and sliced
  • 3/4 cup seedless red grapes, halved
  • 3/4 cup seedless green grapes, halved
  • Ice cubes
  • Optional: Prosecco or sparkling water
  •  
    Preparation

    1. COMBINE the first four ingredients in a large pitcher. Stir until sugar is dissolved. Add the fruit.

    2. REFRIGERATE at least 2 hours or overnight, to allow the flavors to blend.

    3. SERVE chilled over ice, and use a slotted spoon to include peaches and grapes with each serving. For some optional sparkle, add a splash of Prosecco or sparkling water before serving.
     
     
    SANGRIA TIPS

    You are the master of your sangria.

  • If you want more pronounced flavor, add more of that ingredient.
  • If you want a less sweet drink, use unsweetened plain or flavored club soda.
  • Use Prosecco for the wine. Prosecco, an Italian sparkling wine, is known for its peach flavors. You can substitute it for the still wine*; or for the sparkling water/club soda, for a stronger drink.
  • Adjust the sweetness. If you add an ingredient with sugar, adjust the other sugar items so it won’t be too sweet. You can always add more sweetness, but you can’t take it away (without doubling the proportions, that is).
  •  
    Goat Cheese Log
    [9] A log of goat cheese with artisan crackers and melon and mozzarella kabobs can round out the snacks (photo © Zingerman’s Creamery).
     
    Peach Infused Vodka
    [10] Tito’s infuses their vodka with fresh peaches. Here’s how to do it (photo © Tito’s Vodka).
     
     
    THE YEAR’S 8 PEACH HOLIDAYS

  • January 13: National Peach Melba Day
  • April 13: National Peach Cobbler Day
  • June 21: National Peaches ’n’ Cream Day
  • July: National Peach Month
  • July 17: National Peach Ice Cream Day
  • August 22nd: National Eat A Peach Day
  • August 24: National Peach Pie Day
  • August 27: National Peach Day
  •  
    Plus

  • December 20th: National Sangria Day
  •  
    Plus

  • The Year’s 12 Popcorn Holidays
  •  

     
    ________________

    *When making peach sangria, use white wine that is light, fruity, and not oaky. Consider crisp, dry white wines (Albariño, Pinot Grigio, Sauvignon Blanc), fruity, off-dry whites (Gewürztraminer, dry or off-dry Riesling).


    CHECK OUT WHAT’S HAPPENING ON OUR HOME PAGE, THENIBBLE.COM.


    Comments off


    © Copyright 2005-2026 Lifestyle Direct, Inc. All rights reserved. All images are copyrighted to their respective owners.