|
Instead of beer, try hard cider. It’s a natural for quaffing or food pairing, and replaces the flavors of malt and hops with apple or pear (cider made with pears is called perry).
First, the difference between hard cider and fresh cider.
Hard cider is a fermented alcoholic beverage made from the unfiltered juice of apples. The alcohol content varies from a low 1.2% ABV* to 8.5% or higher—some imported ciders can be up to 12% ABV, an average level for table wines.
Fresh apple cider is raw apple juice, typically unfiltered. Thus, it is cloudy from the remnants of apple pulp. It is also typically more flavorful than apple juice—although of course, the particular blend of apples used in either has a big impact on the taste.
Apple juice has been filtered to remove pulp solids, then pasteurized for longer shelf life.
*ABV is alcohol by volume. It is doubled to get the proof. For example, a 40% ABV spirit is 80 proof.
|
|

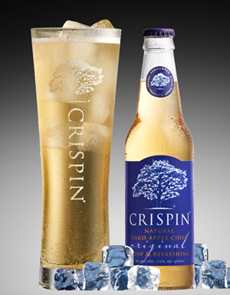
Classic Crispin. Photo courtesy Crispin Cider Company. |
While it may not seem so today, America has a history of hard cider. The English who originally settled the country brought their love of cider, and America was a hard cider country until the 19th century.
Then, waves of German immigration brought the lager makers, and soon enough more Americans were lifting steins of beer instead.
Prohibition dealt hard cider a final blow from which it is just now making a comeback, with impressive annual growth figures. Aiding the effort is Boston Beer Company, makers of Samuel Adams beer and the Angry Orchard cider brand.
Since Prohibition, “cider” in the U.S. has referred to the unfermented, unpasteurized apple juice; with “hard cider” used to indicate the alcoholic beverage. In the U.K. it is the opposite, with “cider” indicating the alcoholic drink for which special cider apples are used.
CIDER VERSUS BEER
Cider is a gluten-free option; beer is made from gluten-rich grains. However, beer is sugar-free, while cider can be quite high in sugar.
Crispin, one of our favorite brands, has 15 grams (three teaspoons) of sugar per serving. Angry Orchard’s Crisp Apple jumps to 23 grams (7 teaspoons of sugar).
Dryer ciders contain less sugar and carbs, and a higher alcohol content because the yeast have been allowed to consume the majority of the natural sugars and convert them to alcohol.
Comparatively, the calories in beer versus hard are similar higher; but cider is higher in carbohydrates due to the higher levels of sugar.
|
Angry Orchard’s Cinnful Apple has a touch of
cinnamon. Photo courtesy Boston Brewing
Company. |
|
CIDER APPLES ARE DIFFERENT
Cider can be made from any variety of apple, but the better ciders are typically blends of culinary apples—the kinds we eat—and cider apples, which are not palatable to humans. Cider makers balance the flavors of different apples and different proportions to produce their blends.
Culinary apples are fruits with a juicy, luscious apple character. The varieties used contribute sweetness as well as a bright acidity, which provides part of the crisp, refreshing backbone. Examples include Braeburn, Elstar, Gala, Golden Delicious, Granny Smith, Jonagold and Red Delicious.
Bittersweet apples are grown solely for making cider. These apples provide more complexity and wine-like characteristics to a cider, like grapes do to a wine, imparting aroma and contributing to the color. They also provide acidity, tannins that impact mouth feel, astringency, and real fruity cider notes. Bittersweet apples in the blend are often unfamiliar to us. For example, Angry Orchard uses French varieties called Amere de Berthecourt, Beden, Binet Rouge, Brairtot Fuji, Medaille d’or and Michelin.
|
|
CIDER HISTORY
In the days before refrigeration, fresh juice would spoil quickly. The only option to preserve it was to ferment it into cider; the alcohol acts as a preservative.
Man has fermented fruit into alcohol since prehistory. But apple cider was raised to an art in France and the U.K. Apple trees were plentiful in both areas. The Romans, arriving in force in Britain in 43 C.E., introduced apple cultivation.
But it was another group of invaders, the Normans, who improved cider making, following their conquest of England in 1066. Apple juice had been fermented into an alcoholic drink earlier in English history, under the Anglo-Saxons. The Normans (from Normandy, France), improved the drink by using cider-specific apples.
The beverage grew in popularity, new varieties of apples were introduced, and cider began to replace wine (the English climate favors apples over grapes). Every farm grew cider apple trees as well as culinary apples, and in the 18th century it became customary to pay part of a farm laborer’s wage in cider.
How did cider get its name? The English word “cider” comes from the Old French sidre, which in turn was adapted from medieval Latin sicera, based on the Greek sikera, from the Hebrew shekar, meaning “strong drink.” What we call fresh cider (not fermented) was known as ciderkin or water-cider.
It’s time to have a glass!
|
|