THE NIBBLE BLOG: Products, Recipes & Trends In Specialty Foods


Also visit our main website, TheNibble.com.


TOP PICK OF THE WEEK: The Best Dried Fruit From Goldenvale Snacks


Succulent dried peaches are just as
satisfying as processed sweet snacks (candy,
cookies and the like). Photo by Katharine
Pollak | THE NIBBLE.

  We enjoy a snack of dried fruit, but our eyes opened wide when we tasted the succulent, moist fruits from Goldenvale Snacks.

Luscious fruits are grown without pesticides in sunny California. The majority of the bounty is shipped to appreciative audiences in Asia. Asian markets in California also carry the resealable packages of dried apples, apricots, blueberries, kiwi fruit, nectarines, peaches (the last two in both white and yellow), plums, persimmons, pears, plums and raisins in a handsome, tri-color medley.

The biggest challenge for those who want the best dried fruit is finding the individual grab-and-go bags elsewhere in the U.S.

A couple of varieties are sold on Amazon (a bulk-size four pounds of white peaches, for example), along with a full line of Goldenvale’s gift selections in baskets. The company will fill consumer orders directly as it works to expand its retail distribution.

Take a look at what’s available online (search for Goldenvale Snacks).

 
Then, ask your grocer to contact ArchFoods.com and bring in the luscious line—so good, we grew to prefer it to candy and the often-bland fresh fruits in our local markets.

Check out our full review of Goldenvale dried fruit.

Find more of our favorite fruits in our Gourmet Fruits section.


Comments off

TIP OF THE DAY: Welcome The Walleye

Wildly popular with sport fishermen, walleye is widely regarded as the best-tasting freshwater fish.

The largest member of the perch family, walleye is native to lakes throughout Canada and the north-central United States. Lake Erie, Lake Winnipeg, Lake of the Woods and other large Canadian lakes yield a plentiful supply of the fish for restaurants and retailers.

Named for its highly reflective, cat-like eyes, the walleye can reach a length of 30 inches and weight of 15 pounds, although typical market size is 1 to 5 pounds.

The peak season is fall through winter. The species has proven difficult to farm, so enjoy fresh walleye while it’s still in season.

 
Fresh-caught walleye. Photo courtesy
Walleye.net.
 
Fine-flaked walleye fillets are prized for their thickness and succulent, sweet, mild flavor. The fish has few bones, which adds to its popularity. The raw flesh is a rich pink color but turns a clear white when cooked.

Bypass the common wisdom to look for clear, bright eyes when purchasing fresh fish. Even in the freshest walleye, the eyes are naturally flat and opaque. The freshness of walleye must be judged by the flesh and skin.


Broiled walleye with zucchini, yellow squash
and roasted potatoes. Photo courtesy
AllWhitesEggWhites.com.
  How To Prepare Walleye

A very versatile fish, walleye can be baked, broiled, fried, deep-fried, grilled, poached, stuffed, sautéed and made into chowder. Simple preparations are the best way to showcase the delicate flavor.

  • Batter frying locks in the juiciness and is a popular way to serve walleye. Consider fish and chips with a side of broccoli.
  • To grill walleye, simply brush the fillets with lemon butter or lime butter.
  • For a fancier preparation, add a light sauce: white wine with garlic or dill.
  •  
    Here’s a delicious recipe for broiled walleye with a crust of almonds, from AllWhitesEggWhites.com. Parmesan cheese and fresh basil create the perfect crust.


    BAKED WALLEYE WITH AN ALMOND CRUST

    Ingredients

  • 4 walleye fillets, about 1-1/2 pounds, cleaned and boned
  • 1/3 cup sliced almonds, crushed
  • 2 teaspoons lemon juice
  • 1 tablespoon Dijon mustard
  • 1 teaspoon soy sauce
  • 1 teaspoon sugar
  • Dash of red pepper
  • 1/4 cup heavy cream
  •  
    Preparation

    1. Preheat broiler. Place walleye in single layer on lightly greased broiler pan.

    2. Combine all remaining ingredients and spread evenly over walleye fillets.

    3. Place fillets on a greased broiled pan and broil five inches from the broiler heat for about 8 minutes or until topping is browned and fish flakes easily when tested with a fork. As with any fish filets, the cooking time will vary depending on the thickness.

    4. Place fish on a heated platter; serve at once.

    Thanks to EuroUSA.net, purveyor of fine fish, for tipping us off to the wonderful walleye.


    Comments off

    TIP OF THE DAY: Try Coconut Oil

    When Dr. Bronner’s asked us to take a look at their new virgin coconut oil, we turned to our chef, Johnny Gnall, for inspiration. Virgin coconut oil is a heart-healthy oil that improves blood cholesterol by increasing the ratio of HDL to LDL. Dr. Bronner’s produces two varieties: a whole kernel version, which has a more intense coconut flavor, and a white kernel version, which has a lighter coconut flavor. Here are Chef Johnny’s tips for how to use the coconut oil:

    When it comes to culinary oils, there are quite a few out there to choose from (see our Culinary Oils Glossary). Rice bran oil is ideal for frying or searing due to its high smoke point; sesame oil is used for its round, nutty flavor, particularly in Asian cuisine; in baking, many recipes recommend canola oil.

    Recently, I tried a fresh-pressed, unrefined coconut oil—an ingredient I don’t use very often.

    Dr. Bronner’s brand, well known for its natural personal care products and its commitment to sustainability and Fair Trade ingredients, recently began to produce a line of food products,* including Dr. Bronner’s Magic All-One! Fair Trade & Organic Fresh-Pressed Virgin Coconut Oil. Long name but good stuff.

     
    Dr. Bronner’s virgin coconut oils in whole kernel (brown label) and white kernel. Photo
    courtesy FairTradeHelps.org.
     

    *Coconut oil is also well known as a beauty product, for skin and hair.

    Foggy San Francisco must have had me yearning for the tropical, as I spent several days experimenting with the virgin coconut oil. I ended up with a handful of fresh (or maybe tried and true, in the tropics) ideas that turn up the sweet on some familiar foods.

    There are a couple of general points to bear in mind when you cook with coconut oil.

  • First, watch the heat. Coconut oil’s smoke point is only around 350°F, so it will burn if you turn the heat too high and don’t keep an eye on things. Medium heat is best: You can still get plenty of caramelization if you wish.
  • Second, different fats and oils emulsify in different ways. So if you decide to substitute coconut oil in a recipe that calls for your oil to be emulsified, it may behave differently than you expect, depending on what other ingredients you’re working with. It’s most likely still doable, but pay attention.
  •  
    I would be remiss if I didn’t pay tribute to what may be the best part of cooking with coconut oil: the heavenly aroma that wafts up to you as you cook. I could inhale it deeply all day!

    Your mouth will water as you breathe in the tropical perfume, perhaps conjuring hula girls and glorious sunsets in your head. What better way to whet guests’ appetites than by filling the house with the heavenly aroma of coconut?

    Try these applications as a jumping off point:


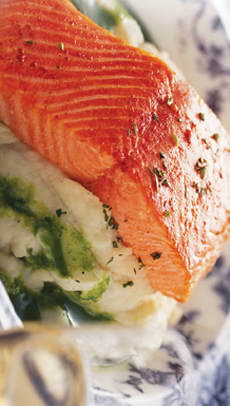
    Coconut oil makes a delicious glaze for
    salmon. Photo courtesy Vital Choice.
      Baking Trays: This trick is simple and subtle, but can yield exceptional results. Try greasing your baking trays with coconut oil. From muffin tins to cake pans, anything you plan on baking at 350°F can benefit from a a little tropical goodness. You may not notice it in bigger and bolder desserts, but when its subtle presence does register, you’ll have a new, delicious layer of flavor in your baked treats.

    Caramelized Onions: Simply caramelize onions as you normally would, but use coconut oil in place of butter or other oil. Just remember to adjust your heat accordingly, in order to keep the coconut oil from smoking.

    Chicken (with skin on): Whenever you cook skin-on chicken pieces, you should be starting them out by seasoning them well and searing them in a very hot pan. If you don’t, you’re missing out on the amazingness that is crispy chicken skin. It’s a little indulgent, sure; but eaten in moderation you have little to worry about. The next time you want to get your skin crispy, do it in coconut oil. You may never go back to your previous oil.


    Glaze/Sauce For Fish: In a small saucepan over medium heat, whisk together 2 tablespoons of coconut oil, 1 tablespoon of butter, a teaspoon of rice vinegar, a tablespoon of sambal chili paste, the zest of an orange, the juice of half an orange and a tablespoon of black sesame seeds. Try it on salmon; you’ll be very happy you did.

    Grilled Corn: Save this tip for local summer corn. Slather the ear of corn in coconut oil, wrap it in foil and throw it on the grill. For added flavor intensity, remove the foil for the last few minutes. Summer corn just got even sweeter!

    Hearty Grains: From amaranth to barley to farro and even polenta (see our Grains Glossary for more ideas), cook the grains as you normally would. Then fold in coconut oil a tablespoon at a time, until you reach your desired flavor profile. A few drops of acid (citrus, vinegar or other favorite) for pop and the right amount of seasoning will make any grain prepared like this taste truly exceptional.

    Pad Thai: A couple tablespoons of peanut butter, a squeeze of lime juice, a teaspoon of sugar, a teaspoon of fish sauce and a tablespoon of coconut oil create a quick and and easy Pad Thai sauce. This is not a traditional recipe by any means, but it is on par and definitely delicious. Make the dish with your choice of noodles (I’m partial to wide rice noodles), protein (shrimp and egg for me, but chicken, pork and tofu will work), and garnish (mung bean sprouts, crushed peanuts, sliced green onions, more lime juice and a generous spoonful of sambal). There’s no need to go out for pad thai when it’s so easy to make at home.

    Popcorn: Use coconut oil to pop your corn, using the old-fashioned, sans-microwave method. Simply drop a tablespoon or two of coconut oil into the pot before the corn kernels, and you’ll end up with popcorn scented gently with that incredible coconut aroma. A little bit of salt and butter, and you’re good to go.

    Seared Mushrooms: If you can get your hands on some big King Trumpet mushrooms, they’re ideal for this application, cut into just 2 or 3 thick slices lengthwise to preserve the integrity of their shape. If not, standard white/button mushrooms are fine; slice them as you would the King Trumpets, into thick slices. Get the coconut oil to just before smoking point and drop in the mushrooms, taking care to get each piece against the pan and everything in a single layer. Then simply keep an eye on them and be patient. After 5 to 8 minutes, flip one piece over. If you see a luscious golden-brown coloring on one side, give the pan a shake to flip the rest. The coconut flavor gets infused into the meat of the mushroom and the resulting sweet umami treat is unique and incredible. Make sure to season with salt and pepper, but not until after you flip the mushrooms.

    Spinach & Other Greens You need nothing more than the greens, the coconut oil, salt and pepper. Sauté the greens until wilted and season to taste: Getting kids and resistant adults to eat their vegetables may become a whole lot easier. (One note: This doesn’t work well with collard greens. Collards are the one kind of hearty green that need more than a sauté to cook down to an edible pleasantness. You either have to braise them for a while, or at least blanch them prior to sautéing. Other greens like chard, kale and spinach wilt/break down more easily, and can therefore be easily sautéed).

    If you can’t find Dr. Bronner’s virgin coconut oils locally (try natural food and health food stores), both white kernel and whole kernel oils are available on Amazon.
      

    Comments off

    PRODUCT UPDATE: New Varieties Of Village Harvest Whole Grains

    Last spring, one of our Top Picks Of The Week was Village Harvest, absolutely delicious pre-cooked and flash-frozen whole grains that are ready to eat after a minute in the microwave.

    This brilliant line addresses the need to eat more whole grains while removing the time challenge of cooking them. All you need to do is open the package and put the grains in a microwave-safe bowl.

    It’s just that simple, and we could eat them every day. The only challenge is finding them: We have to get to a Whole Foods Market. Retailers, please take note! (Here’s a store locator.)

    The line originally included Brown Rice; Brown, Red, Wild Rice Medley; Quinoa; “Un” Fried Brown Rice; and Spicy Thai Brown Rice.

    The varieties have been tweaked, and the expanded line now includes:

     
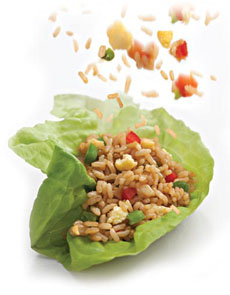
    Serve whole grains in a lettuce cup.
    Photo courtesy Village Harvest.


    Open bag, heat in microwave: In one minute
    you have delicious whole grains. Photo
    courtesy Village Harvest.

     
  • Brown, Red & Wild Rice
  • Corn & Black Bean Creations (with brown rice and wild rice)
  • Cranberries & Almond Creations (with barley, quinoa and wheatberries)
  • Farro & Red Rice
  • Golden Quinoa
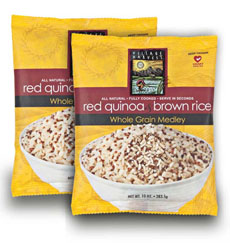
  • Red Quinoa & Brown Rice
  • Wheatberry & Barley
  •  
    The company also features dozens of recipes that incorporate the quick-cooking grains.

    We “wholly” recommend these delicious grains and promise you’ll love the discovery.

     
    Here’s our original review.

    How Many Types Of Grains Have You Had?

    Check out the different types of rice and a broader view of the different types of grains.


    Comments off

    TIP OF THE DAY: Banana Seal, The Best Bag Clip

    It’s official: After months of testing—and years of buying inferior chip clips and other closures that we found in stores—we can proclaim that Banana Seal is the best bag sealer we’ve ever tried.

    Airtight, watertight, foolproof and easy to use, chip clips and other fasteners can’t begin to compete. The patented design provides a guaranteed airtight seal on any bag, in any condition.

    Use it on any type of bag: chips, cereal, coffee, cookies, greens, pet food, sugar and flour, anything in the pantry or freezer.

    A center rod, the “banana,” locks firmly into a U-shaped seal. There are wider versions for pet and lawn products.

    It’s amazing how crisp our chips have stayed, a month after opening the bag.

     
    Our favorite bag closure: Banana Seal.
    Photo courtesy Seal-A-Bag.com.


    Banana Seal, close up: The “banana” locks
    into the airtight, watertight seal. Photo
    courtesy Seal-A-Bag.com.
     

    We couldn’t be happier.

    Single large-size Banana Seals can be found for $1.50 and $4.99 for a 4-pack; tubes of 18 seals in assorted sizes (7.5″, 9.5″ and 11.5″) are $19.99 at hardware stores and other retailers (try Rite-Aid) nationwide. The 18-piece assortment is available online for $18.00 at Seal-A-Bag.com.

    Custom sizes can be created by cutting a Banana Seal with scissors. The product is dishwasher-safe.

    If you want one size only, we found something similar on Amazon, available in small, medium and large widths; 10 seals for $8.99, $10.99 and $14.99, depending on size.
      

    Comments off

    The Nibble Webzine Of Food Adventures
    RSS
    Follow by Email


    © Copyright 2005-2024 Lifestyle Direct, Inc. All rights reserved. All images are copyrighted to their respective owners.