THE NIBBLE BLOG: Products, Recipes & Trends In Specialty Foods


Also visit our main website, TheNibble.com.

A Sticky Toffee Pudding Recipe For National Sticky Toffee Pudding Day

January 23rd is National Sticky Toffee Pudding Day, celebrating a classic British dessert that is too seldom found in the U.S. But let’s put an end to that:

There’s a delicious recipe below.

Sticky Toffee Pudding is not a pudding as Americans know it, but a steamed sponge cake with toffee sauce.

Sticky toffee pudding (known as sticky date pudding in Australia and New Zealand) is a moist sponge cake optionally made with finely chopped dates which add sweetness and moisture to the cake.

  • The toffee sauce, made with butter, cream, and different brown sugars depending on the recipe*, is poured over the warm cake, giving it a sticky and gooey texture.
  • It’s often served with vanilla ice cream or custard (highly recommended!)
  •  
     
    The history of sticky toffee pudding is below.

    > The difference between butterscotch, caramel, and toffee.
     
     
    STICKY TOFFEE PUDDING VARIATIONS

    Thanks to Audra, The Baker Chick, who creates absolutely delicious recipes, for this sticky toffee pudding recipe.

    Her rich cake is made with dates, rum, flour, eggs, butter, and sugar, and served with a warm toffee sauce.

    Sign up for her emails. You’ll want to make everything!

    Ingredients For An 8-Inch Cake

  • 8 ounces dates, pitted
  • 1/2 cup light rum
  • 2 cups all-purpose flour
  • 1-1/2 teaspoons baking powder
  • 1/2 teaspoon salt
  • 1/2 teaspoon ground cinnamon
  • 1/4 teaspoon baking soda
  • 1/2 cup (1 stick) unsalted butter, softened, plus more for pan
  • 1 cup packed dark-brown sugar
  • 2 large eggs, room temperature
  •  
    Ingredients For The Toffee Sauce

  • 1 cup heavy cream
  • 1 cup packed dark-brown sugar
  • 1/4 cup (1/2 stick) unsalted butter, cut into small pieces
  • 1/4 cup light rum
  • 1/2 teaspoon sea salt
  •  
    Preparation

    1.  PREHEAT the oven to 350°F. In a small saucepan combine the dates and rum and bring to a boil. Reduce the heat to low and simmer for about 3 minutes, until the dates are blistery and soft.

    2. USE an immersion blender or food processor to blend the dates and rum into a creamy paste. Set aside. Meanwhile, in a medium sized bowl…

    3. STIR together the flour, baking powder, salt, cinnamon and baking soda. Stir together and set aside. In a large bowl…

    4. CREAM cream together the butter and brown sugar with an electric mixer to until fluffy. Add the eggs one at a time, mixing until well-combined.

    5. ADD the flour mixture in batches, alternating with the date paste, starting and ending with the flour. Don’t over-beat the batter; mix just until smooth and well-combined.

    6. GREASE or spray an 8-inch round or square pan and pour the batter in, smoothing the top with the back of a spoon. Bake for 20 minutes, then reduce the heat to 325°F and bake for another 10-15 minutes or until a cake tester inserted into the middle of the cake comes out clean. While the cake is baking, make the sauce (step #8).

    7. COOL the cake on a wire rack for 5 minutes and then run a knife around the edge and invert it onto a cake stand or plate.

    8. MAKE the sauce. Combine the brown sugar, butter, cream, and rum in a small saucepan over medium heat. Whisk until well-combined and smooth. Cook until bubbly, then remove from heat and stir in the sea salt.

    9. POKE holes all along the top and sides of the cake with a fork, trying to get the holes at least half way through. Slowly pour about half of the sauce over the top and sides of the cake, making sure it soaks in before adding more.

    10. SERVE warm with additional sauce and whipped cream or ice cream.
     
     
    STICKY TOFFEE PUDDING RECIPE VARIATIONS

    The dessert has inspired numerous variations, including:

  • Chocolate Sticky Toffee Pudding: Incorporate cocoa powder or melted chocolate into the sponge mixture to add a chocolatey twist to the classic recipe.
  • Nutty Sticky Toffee Pudding: Add chopped nuts such as pecans, walnuts, or almonds to the sponge batter for a crunchy texture and nutty flavor.
  • Fruit-Infused Sticky Toffee Pudding: Different fruits like apples, bananas, figs, or pears enhance the sweetness and add another fruity dimension to the pudding.
  • Ginger Sticky Toffee Pudding: Infuse the sponge batter with ground ginger or add chopped crystallized ginger for a warm and spicy kick. You can also use allspice, clove, nutmeg, and cinnamon—in essence, pumpkin pie spices.
  • Rum or Whiskey Sticky Toffee Pudding: A splash of rum or whiskey in the toffee sauce adds depth and complexity to the sweet flavor.
  • Gluten-Free Sticky Toffee Pudding: Just substitute gluten-free flour.
  • Vegan Sticky Toffee Pudding: It’s easy to replace dairy ingredients with plant-based alternatives such as almond milk, vegan butter, and coconut cream.
  •  
    Where else will your palate lead you? Go for it!
     
     
    STICKY TOFFEE PUDDING FORMATS

    You can make anything from a cake to cupcakes with this recipe.

  • Cake:  It can be a square or rectangular single layer cake or a Bundt.
  • Individual Sticky Toffee Puddings: Instead of baking a large cake, make individual servings in ramekins for a stylish presentation and easy serving.
  • Sticky Toffee Cupcakes: Transform the traditional pudding into cupcakes for a portable and portion-controlled treat.
  • Sticky Toffee Cheesecake: Make a layer cake with a cheesecake layer on top.
  •  
     
    THE HISTORY OF STICKY TOFFEE PUDDING

    Sticky Toffee Pudding is a beloved dessert in the U.K., but its origin is a bit unclear. It may have first appeared in Scotland, but we have yet to find the smoking gun (or the first recipe in print).

    Owners of several pubs, including the Gait Inn in Millington, East Riding, Yorkshire (a 16th century pub, claimed to have invented it in 1907) and the Udny Arms Hotel in Newburgh, Aberdeenshire (claim to have invented it in the 1960s) lay claim to the creation.

    What we do know is that the pudding was popularized in the 1970s by Francis Coulson and Robert Lee, who developed and served it at the Sharrow Bay Country House Hotel in Cumbria, in the Lake District of England. It is at that time that the dessert first appeared in a recipe book [source].

    The food critic Simon Hopkinson said Coulson told him he received the recipe from a Patricia Martin of Claughton in Lancashire, and that Martin herself had received it from Canadian Air Force officers who lodged at her hotel during the Second World War.

    From 1907 England to Canada back to England in the 1970s: The true history remains to be found.

    At any rate, it was an immediate hit at the Sharrow Bay Country House Hotel, and the recipe spread out to become a staple in British cuisine.

    A take home version to heat, either in oven or microwave, was developed in 1989 by the owners of the Cartmel Village Shop, “The Home Of Sticky Toffee,” in Cartmel, Cumbria.

    Their product became popular, and by the late 1990s was being sold in supermarkets across the U.K. The dish is now widely available from multiple manufacturers to bake at home [source].

    While it may not have crossed the pond in a big way like fish and chips or scones, we remain hopeful.

    Specialty food purveyors sell sticky toffee pudding online. Check out:

  • Mackenzie Ltd.
  • Jolly Posh Foods
  • Omaha Steaks
  • Amazon
  •  
    You can also find boxed mixes if you don’t want to make the from-scratch recipe above.

    Want to know more? The most thorough investigation we’ve found is from the BBC.


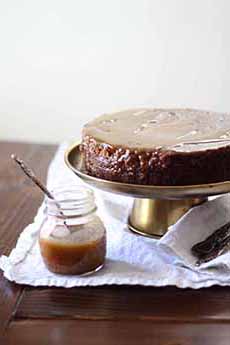
    Sticky Toffee Pudding Cake  on a Pedastel
    [1] The delicious sticky toffee pudding recipe (photos #1 and #2 © The Baker Chick).

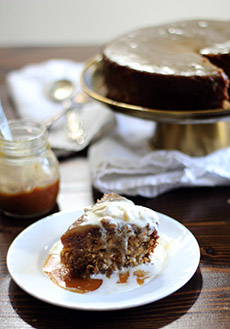
    A slice of Sticky Toffee Pudding Cake
    [2] If you like lots of sauce, double the toffee portion of the recipe.

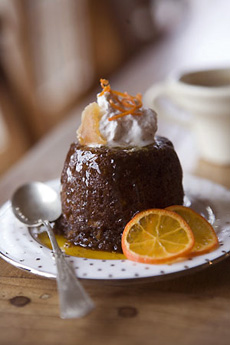
    An individual Ginger-Accented Sticky Toffee Pudding
    [3] Ginger-accented individual sticky toffee pudding garnished with crystallized ginger, candied orange peel, and candied orange slices (photos #3, #4, and #7 © Sticky Toffee Pudding Company).

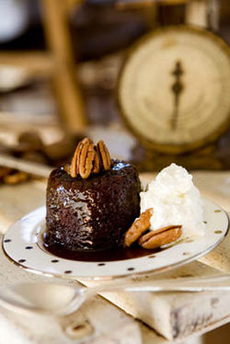
    Individual Sticky Toffee Pudding Topped With Pecans
    [4] Sticky toffee pudding topped with whipped cream and pecans.

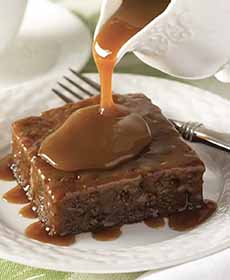
    Pouring toffee sauce on a square of Sticky Toffee Pudding
    [5] Mackenzie Ltd. will sell you frozen sticky toffee pudding that you can defrost when guests drop by (photo © Mackenzie Ltd.).

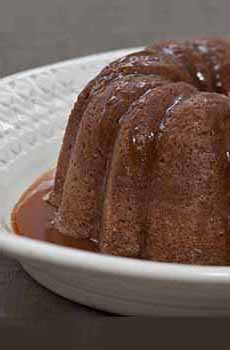
    A Sticky Toffee Pudding made in a Bundt pam
    [6] Sticky toffee pudding made in a Bundt pan (photo © Anson Mills).

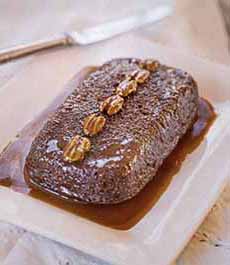
    Sticky Toffee Pudding made in a loaf pan
    [7] Sticky toffee pudding made in a loaf pan.

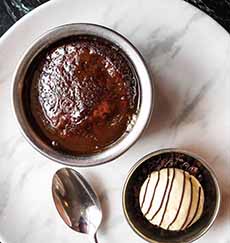
    Sticky Toffee Pudding in a ramekin with a side dish of vanilla ice cream
    [8] Fancy: Sticky toffee pudding in a ramekin, warm from the oven, with a side dish of vanilla ice cream (photo © Bluebird Bar & Restaurant | Facebook).

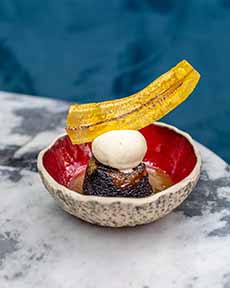
    A fancy Sticky Toffee Pudding presentation with a plantain chip garnish
    [9] Adding some crunch and visual appeal with a plantain chip (photo © Sushi Samba | Facebook).

     
    ________________

    *The dark sugars can be brown sugar, jaggery, molasses sugar, muscovado, or panela, depending on the recipe. Check out the different types of sugars in our Sugar Glossary.


    CHECK OUT WHAT’S HAPPENING ON OUR HOME PAGE, THENIBBLE.COM.


    Comments off

    Homemade Sriracha Sauce: An Easy Recipe For National Hot Sauce Day

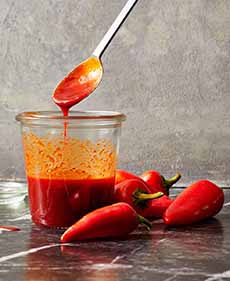
    A jar of homemade sriracha sauce
    [1] A different homemade sriracha recipe, from Good Housekeeping, is milder, using Fresno chiles, jarred roasted red peppers, and dark brown sugar (photo © Good Housekeeping).

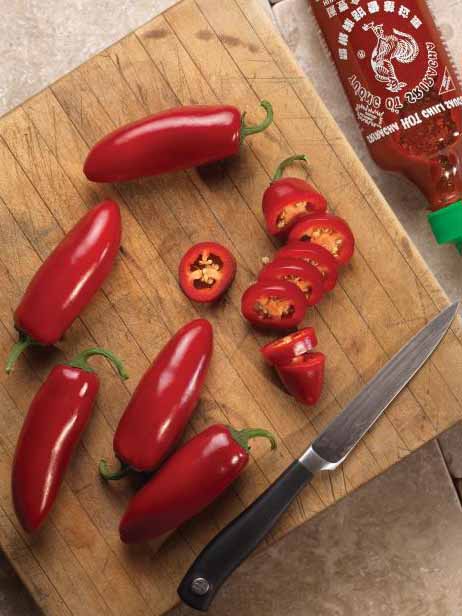
    Red Jalapeno chile peppers on a cutting board
    [2] Red sriracha sauce requires red jalapeños. Want to grow your own? Head here (photo © Ball Horticultural Company).

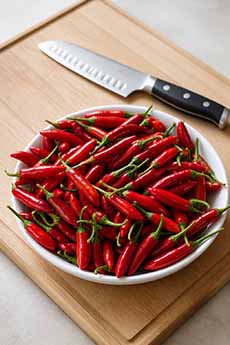
    A Bowl Of Red Serrano Chiles [3] Red serrano chiles. Green chiles are less ripe, and therefore less sweet, than red chiles (photo © The Nibble).

    Bottle Of Huy Fong Sriracha Sauce
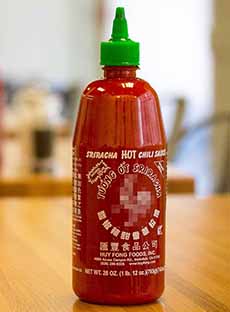
    [4] America’s favorite sriracha sauce, Red Rooster from Huy Fong (photo © Steven Depolo | Wikipedia).


    Updated August 2026

    National Hot Sauce Day, on January 22nd, is an occasion to make your own Sriracha hot sauce. Many Sriracha lovers are feeling fiery about the news.

    Fear not! The team at Food Fire Friends shares an easy recipe. how you can make your own Sriracha sauce at home.

    It takes only 15 minutes to prepare, then 3-5 days to ferment.

    The recipe follows.

    Elsewhere on The Nibble:

    > When did Sriracha become the “it” hot sauce?

    > The history of chiles.

    > The different types of chiles: a photo glossary.

    > The Scoville Heat Units Scale.

    > The year’s 12 hot and spicy holidays.
     
     
    RECIPE: SRIRACHA SAUCE

    Prep time is 5 minutes. Cook time is 10 minutes. Fermentation time is 3-5 days.
     
    Ingredients

  • 1-pound of red jalapeño chile peppers, stems removed
  • ½ pound of red serrano chile pepper, stems removed
  • ⅓ cup water
  • 3 tablespoons coconut sugar
  • 1 tablespoon lemon juice
  • 3 cloves of garlic, peeled
  • ½ cup of distilled white vinegar
  • ½ teaspoon of cayenne pepper
  •  
    Preparation

    1. PLACE the jalapeño and serrano chile peppers in a blender or food processor with water, garlic, cayenne pepper, coconut sugar, and lemon juice, and blend until smooth.

    2. TRANSFER the mixture into a large glass jar and let cool in a dark place for 3 to 5 days, brushing down the sides with a spoon once a day. The mixture will begin to bubble and ferment. Make sure to re-wrap the mixture after each scraping.

    Once the mixture is bubbly and has set up to 3 to 5 days…

    3. STRAIN and pour it back into the blender and blend it with vinegar until smooth. Discard the remaining pulp, seeds, and skin left in the strainer.

    4. TRANSFER the mixture into a small saucepan. Bring it to a boil over medium heat and stir often for 5 to 10 minutes. The mixture will begin to thicken. When it reaches your desired thickness, remove it from the stpve.

    5. LET the sauce cool to room temperature; it will continue to thicken. Transfer the sauce to jars and store in the refrigerator for a few hours before serving. Keep the unused sauce in the fridge.


    A tray of Sriracha Deviled Eggs
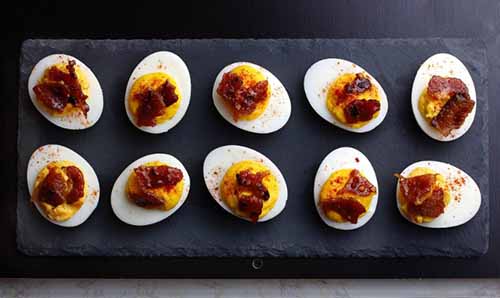
    [5] Many Americans like sriracha sauce on everything. How about Sriracha Deviled Eggs? Here’s the recipe, which is garnished with candied bacon (photo © McCormick).


    CHECK OUT WHAT’S HAPPENING ON OUR HOME PAGE, THENIBBLE.COM.


    Comments off

    RECIPE: Green Bean Salad With Bacon Vinaigrette & Bacon Garnish

    If your salads have the winter blahs, you can revive them with bright red vegetables, fruits (apples, pears, dried cranberries, pomegranate arils), other colorful produce, and nuts.

    Another idea: Make this snappy salad with green beans instead of lettuce. You can make it with cooked green beans, but we like the beans to be raw and crunchy.

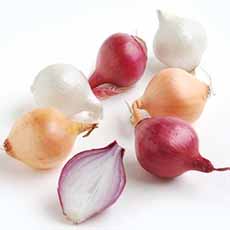
    You can also add, or substitute, baby potatoes for the pearl onions. You can also add slices of sweet onion (or if you prefer, pungent red onion).

    A sharp Dijon vinaigrette and a generous scattering of crisp bacon complete the recipe.

    > The history of green beans is below.
     
     
    RECIPE: GREEN BEAN SALAD

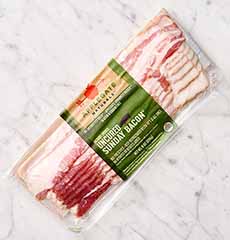
    Thanks to Applegate for this recipe, which uses Applegate Naturals® Sunday Bacon® Brand in the recipe.

    This naturally cured bacon, imbued with a delightful hickory smoked flavor is minimally processed with no artificial ingredients, no preservatives, and is gluten-free.

    Prep and cook time is less than 30 minutes.
     
    Ingredients For 8 Servings

  • 2 pounds green beans, trimmed
  • 1 (10-ounce) package fresh pearl onions
  • 1 (8-ounce) package Applegate bacon or substitute, chopped
  • 2 tablespoons olive oil, or as needed
  • 2 tablespoons grainy or regular Dijon mustard
  • 2 tablespoons apple cider vinegar
  • Salt and freshly ground black pepper
  •  
    Preparation

    1. WASH and trim the green beans. If serving them raw, set aside. If not, bring a large pot of well-salted water to a boil. Add the beans and boil until bright green and tender, about 5 minutes.

    2. USE tongs to scoop out the beans and place in a colander to drain. Set aside. Add the pearl onions to the boiling water and boil until tender, about 5 minutes. Drain well. When cool enough to handle, trim and peel the onions.

    3. COOK the bacon in a skillet over medium heat, stirring occasionally, until it is very crisp, about 10 minutes. Using a slotted spoon, transfer the bacon to a plate lined with paper towels. Measure into a cup how much bacon fat is in the pan; there should be about 2 tablespoons.

    4. RETURN the bacon fat to the skillet over medium-low heat and add enough olive oil to equal 4 tablespoons total fat. Add the mustard and cider vinegar and stir to combine well. Season to taste with salt and pepper.

    5. TOSS the green beans and the onions with the hot dressing; taste and adjust the seasonings. Transfer the vegetables to a serving dish and top with the crisp bacon.
     
     
    THE HISTORY OF GREEN BEANS

    Green beans (Phaseolus vulgaris), also known as string beans or snap beans and originally called string beans, have existed for thousands of years.

    They have a long history of cultivation. Archaeological evidence from Mexico suggests that green beans were cultivated there more than 7,000 years ago.

    They are native to Central and South America and likely originated in what is now Peru.

    Spanish explorers are credited with bringing green beans to Europe. By the 16th century, green beans were being cultivated in European gardens.

    Over time, different varieties of green beans were developed. French green beans (haricots verts), known for their slender shape and tender texture, gained popularity in Europe.

    Green beans made their way to North America through European colonization. They became a staple in colonial gardens and were widely consumed by early American settlers. Their ease of cultivation and nutritional value contributed to their popularity as a garden vegetable.

    In the 19th century, selective breeding began to eliminate the tough, fibrous strings that were naturally present in string beans and had to be removed before cooking.

    Around 1894, a plant breeder named Calvin N. Keeney released the first stringless green bean called the “Stringless Green Pod,” which became popular for its tender and easy-to-eat pods.

    The invention of stringless green beans contributed to further popularity in home gardens and commercial agriculture.

    With advancements in food preservation techniques, green beans became one of the vegetables commonly canned for convenience and long-term storage.


    A bowl of Green Bean Salad With Pearl Onions & Bacon, with bacon vinaigrette
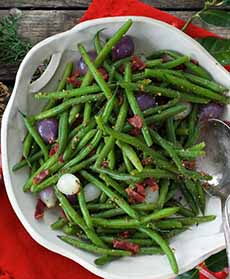
    [1] A year-round salad especially welcome in the winter (photo © Applegate).

    Fresh Green Beans on a cutting board
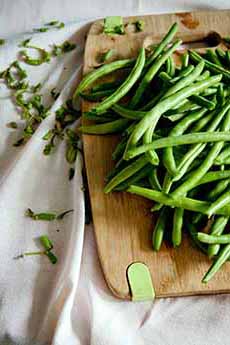
    [2] Fresh green beans (photo © Neha Deshmukh Wesual | Unsplash).

    Multicolor Pearl Onions (Uncooked)
    [3] Pearl onions (photo © Melissa’s Produce).

    A Package of Applegate Sunday Bacon
    [4] Applegate Uncured Sunday Bacon (photo © Zabar’s).

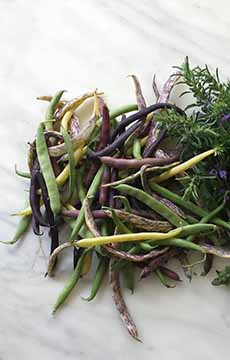
    Assorted colors of green beans: green, yellow, purple, purple spotted
    [5] Different colors: dragon’s tongue (purple spotted), green, purple, and yellow beans (photo © The Pines | Brooklyn [alas, permanently closed]).

     
    As with all vegetables, today, there are numerous varieties of green beans available.

    Green beans and yellow wax beans are the same species and genus, but they have been selectively bred to express different traits such as pod color. There are also beautiful purple beans that turn green when cooked.

    The genus and species belongs to the family Fabaceae or Leguminosae, commonly known as the legume, pea, or bean family.

    Green beans are enjoyed in cuisines worldwide, both fresh and cooked.


    CHECK OUT WHAT’S HAPPENING ON OUR HOME PAGE, THENIBBLE.COM.


    Comments off


    © Copyright 2005-2026 Lifestyle Direct, Inc. All rights reserved. All images are copyrighted to their respective owners.