TIP OF THE DAY: How To Cook Lobster
|
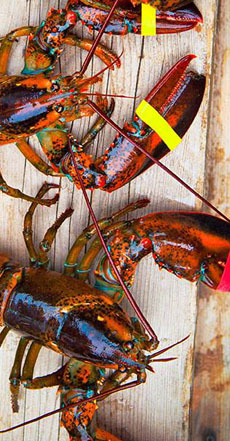
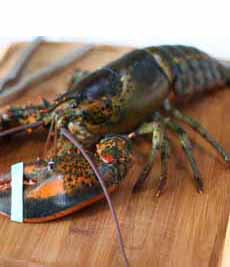
This guide to boiling live lobster is from Joe Bowab, CEO of Lobster Anywhere, which ships whole live lobsters and frozen lobster tails and other parts nationwide. Lobster, “the king of crustaceans,” is the most luxurious seafood. For us, it’s often the reason many lobster lovers head to a restaurant. But if it’s just steamed, why can’t you save money and cook live, whole lobsters at home? You can! And you don’t need to be a skilled chef to do so. If you know how to do it, it’s easy to prepare the mouth-watering, high-protein delicacy in your kitchen. Master the art of boiling lobster with this easy-to-follow guide. This is because premium lobster meat isn’t generally available in supermarkets, due to the fact that most meat that is cut into parts is mass-produced. This results in lower quality. The best way to go is to buy whole, live lobster locally or online. Only live, fresh lobsters ensure the highest quality. If you buy a lobster from the tank, look at the underbody of the lobster, particularly the claws. They should be a vibrant red. A live lobster should have no odor. Also look for long antennae. Lobsters that have been there for a long time often have their antennae nibbled down by other lobsters. Lobsters can be cooked in various ways, but top chefs will always boil them. It doesn’t take long to prep and cook, and it’s a beautifully presentation. You may be surprised to learn it takes just 6 minutes to boil a 1-pound lobster. Add 3 minutes per pound for each additional pound thereafter. You will know if your lobster is overcooked, if the meat is too firm and rubbery. Don’t be too disappointed if this happens. You will get it right next time. Of course, this depends on the size of the lobster, so watch out in case you under-cook, or even worse, over-cook. You never want to overcook lobster as it will ruin the taste and texture. Simply remember to keep an eye on it and you’ll be just fine. 1. FILL a pot large enough for your lobsters, one-half to two-thirds full of cold water. Note: Use about 1 gallon of water per lobster so it is deep enough to submerge the lobsters by at least 3 inches. Otherwise, use two smaller pots. 2. ADD 2 tablespoons of salt for each quart of water. If you’re lucky enough to have access to seawater for boiling the lobster, even better. Then you can skip the salt. 3. BRING the water to boil over high heat. Make sure it is bubbling hot. 4. TURN down the heat; then pick up the lobster by holding the upper side of the thorax between your thumb and middle finger (or use tongs). 5. HOLD the underside of the body away from you: Lobsters have a tendency to flip their jointed tail, splattering the boiling water. 6. PLACE the live lobsters in head first, one at a time, making sure to completely submerge them. 7. COVER the pot tightly and immediately return to a boil. 8. START the timer as soon as the water starts to boil again. You need to make sure you use a timer and prevent the water from boiling over. Once the time is up… 9. CAREFULLY REMOVE the lobsters from the pot with tongs. Be careful: The boiled lobsters will be extremely hot. 10. PLACE them in a bowl for five minutes to cool before you can begin to unshell the meat. You will know that the lobster is done because the meat has turned from translucent to white. 11. PIERCE the shell. When a lobster boils it retains a lot of water. Once you take it out of the pot, pierce the body and tail with a knife to help drain the water. Boiled lobster is usually served with clarified butter (see how to make it in the footnote), lemon wedges, salt and pepper. You can try them all to determine what tastes best for you. If you can find Indian ghee locally, you can substitute it for clarified butter. Here’s the difference between ghee and clarified butter, and how to make ghee. Head to LobsterAnywhere.com to order your fresh Maine lobster. Tell your family to prepare for a treat! |
|
|
|
________________ *Clarified butter, also called drawn butter, is unsalted butter that has been slowly melted, evaporating much of the water and separating the milk solids. All that remains is pure liquid golden-yellow butterfat. Because the milk solids have been removed, clarified butter has both a long shelf life (it will keep from going rancid longer) and a high smoke point (it can be used in frying without burning). To clarify butter, melt unsalted butter in a saucepan over low heat. Skim the froth from the top and carefully pour off the clear liquid, leaving the milky residue behind. Clarified butter is also served with crab meat. Why clarify the butter instead of simply serving a melted stick of butter? By heating and separating the butterfat from the solids and water that naturally occur in butter (clarifying), you get a much richer and intense butter flavor than if you were simply to use melted butter. Check out the different types of butter.
|
||