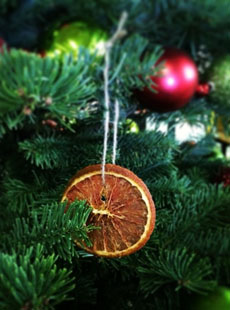
TIP OF THE DAY: Make Christmas Tree Ornaments From Dehydrated Citrus
|
|
You—or your kids—can make these dehydrated citrus ornaments in your oven. You don’t need an electric dehydrator, but if you have one, great. The fruit slices become translucent after drying, adding color and textural interest to any display. A convection oven is better than a conventional oven, but the latter works, too. In addition to tree ornaments: Ingredients 1. PREHEAT Preheat the oven to its lowest temperature setting, usually 140°F. (To use a food dehydrator, set the temperature to between 125°F and 135°F and dry for 2-12 hours. Remember to rotate your dehydrator trays for even drying.) 2. CLEAN the skins of the citrus with a damp towel. 3. CUT the citrus into slices from 1/4″ to 3/8″ thick. If using the cloves, use an ice pick to punch holes for them in the surface skin (not in the white pith). TIP: Pressing in cloves can create a sore spot on your finger. Use a thimble. |
|
|
4. PLACE a wire rack atop a baking sheet(s), and arrange the slices on the rack. Place the sheet(s) in the oven, but leave the door open 2 to 4 inches. This enables the air to circulate and the moisture to escape, dehydrating the fruit. If you are preparing more than one tray, rotate the trays halfway through for even drying. TIP: You can set a fan just outside of the oven to supply further air circulation, and to help speed drying. 5. DRY the orange slices in the oven for 6 to 12 hours, or until the peel is hard and the fruit is brittle. Allow the slices to cool completely; then store in an airtight container until ready to create the hanging loops or otherwise use them. 6. USE an ice pick or other sharp implement to puncture a hole for hanging through the flesh of each piece. Use string (the metallic wrapping string is great here) to create a loop for hanging on tree branches. If you’re using a gift card, place it on the string before tying the knot. |
||