THE NIBBLE BLOG: Products, Recipes & Trends In Specialty Foods
Also visit our main website, TheNibble.com.
|
May 11, 2010 at 7:34 am
· Filed under Appetizers-Hors d’Oeuvre, Food Holidays, Recipes, Spreads-Dips-Salsa
|
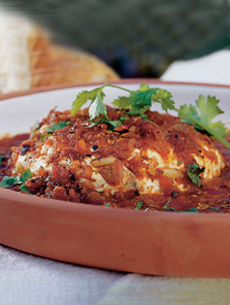
Celebrate National Salsa Month with Salsa-
Baked Cheese. Photo courtesy
FronteraFiesta.com. |
|
For National Salsa Month, try a new way to use salsa.
This is salsa’s answer to baked Brie: fresh goat cheese or cream cheese topped with a flavorful salsa and baked until warm. It’s from Chef Rick Bayless of FronteraFiesta.com.
Serve Salsa-Baked Cheese with Dirty Martinis, Margaritas or beer.
RECIPE: SALSA-BAKED CHEESE
Ingredients
– ¼ cup pine nuts or coarsely chopped walnuts or pecans
– 8 ounces soft cream cheese or goat cheese or a combination
– 1 jar (16 ounces) of interesting salsa (suggestions:
Frontera Mango Key Lime, Roasted Tomato or Spanish Olive Salsa)
– Chopped fresh cilantro
– Crackers and/or sliced, toasted baguette |
| Preparation
1. Toast nuts in a 350°F oven until fragrant, 7 or 8 minutes. Transfer to a bowl.
2. Stir in cheese. Shape into a disc and lay in an ovenproof baking dish.
3. Pour salsa over cheese and bake until heated through, 10 to 15 minutes. Sprinkle with cilantro and serve with crackers or toasted bread.
Find reviews of our favorite salsas, more recipes and our Salsa Glossary.
|
|
|
Permalink
|
|
May 10, 2010 at 4:41 pm
· Filed under Contest, Fish-Seafood-Caviar
|
| Whether you’re in the mood for Asian, Caribbean, Italian or good modern American cuisine, Sea Cuisine has an entrée for you.
If you win this week’s Gourmet Giveaway, you’ll be able to choose from a wide variety of chef-inspired recipes, including Tortilla Crusted Tilapia, Tuscan Parmesan Crusted Shrimp and Roasted Garlic & Herb Scallops.
Sea Cuisine specializes in restaurant-quality frozen dinners, finished in flavorful crusts or delicate sauces. Regardless of which ones you choose, you can be assured of a dish made with the finest ingredients.
- THE PRIZE: Two winners will each receive coupons for five free Sea Cuisine entrées. Enjoy “seafood night” with your family and friends, or keep them in the freezer for those nights when you’re too tired to cook, yet what something yummy and high in protein. Approximate retail value: $35.00 each.
- To Enter This Gourmet Giveaway: Go to the box at the bottom of our Gourmet Seafood Section and enter your email address for the prize drawing. This contest closes on Monday, May 17th at noon, Eastern Time. Good luck!
- To learn more about Sea Cuisine, download $1 off coupons and check out Sea Cuisine’s sweepstakes, visit SeaCuisine.com.
|
|

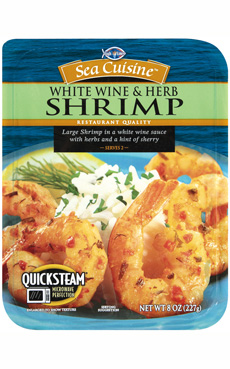
Yum: White Wine & Herb Shrimp. Enjoy
these and other choices as the winner—or go
for the $1 coupon. Photo courtesy Sea Cuisine. |
|
|
|
Permalink
|
|
May 10, 2010 at 11:06 am
· Filed under Appetizers-Hors d’Oeuvre
|
|
A new way to enjoy guacamole! Photo
courtesy FronteraFiesta.com. |
|
Guacamole is popular party fare. But for a sophisticated cocktail party, you don’t want to dip tortilla chips.
Turn that guac into something special with this recipe from Top Chef Masters winner Rick Bayless, owner of Chicago’s Frontera Grill and Topolobampo restaurants.
RECIPE: CHERRY TOMATOES WITH
PUMPKIN SEED GUACAMOLE
Ingredients
– 30-40 large cherry tomatoes
– 3-4 avocados
– ½ cup Frontera Guacamole Mix (or make your own
guacamole recipe)
– ¼ cup cilantro, chopped
– Salt to taste
– ½ cup pepitas (toasted pumpkin seeds) and/or
crumbled cooked bacon |
Preparation
1. Slice the cherry tomatoes in half lengthwise. Gently scoop out the pulp and seeds of each tomato half.
2. Lightly salt the insides of the tomatoes and turn over onto paper towel. Let sit to drain out the liquid.
3. To make the guacamole, cut each avocado in half. Remove the pit and scoop out the flesh from each half. Mash the avocado with a potato masher or fork. Stir in guacamole mix, cilantro and salt to taste.
4. Using a small spoon, fill each tomato half with guacamole. Place on serving tray.
5. Garnish with three pepitas or crumbled bacon. Or, alternate toppings on the tray.Makes 60-80 hors d’oeuvre.
Find more of our favorite hors d’oeuvre recipes and an hors d’oeuvre estimator: how many pieces do you need per guest.
|
|
|
Permalink
|
© Copyright 2005-2026 Lifestyle Direct, Inc. All rights reserved. All images are copyrighted to their respective owners.