THE NIBBLE BLOG: Products, Recipes & Trends In Specialty Foods


Also visit our main website, TheNibble.com.


TIP OF THE DAY: How To Use A Pizza Stone


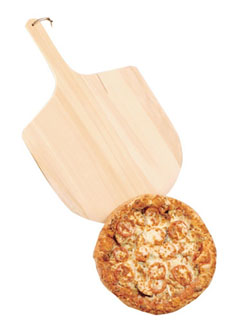
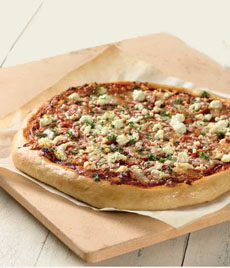
Pizza stones can be square or round. Photo
of this top-rated pizza stone courtesy
KingArthurFlour.com.
  Here’s a gift for anyone who makes pizza at home—or needs some encouragement to do so. This tip is from Chef Johnny Gnall. If you have questions or suggestions for tips, email Chef Johnny.
If you are a true pizza lover, your home should not be without a pizza stone…and a pizza paddle too. If you’ve never used a pizza stone, you don’t know what you’re missing! It’s the only way to achieve restaurant-quality crust at home.

A pizza stone makes a great holiday gift for any pizza lover, from the seasoned chef to kitchen beginner. I assure you: it will change the way you eat pizza forever!

For those who resist buying single-use gadgets: Rest assured, you can do more with a pizza stone than make pizza.


The simple beauty of a pizza stone is its ability to get crazy hot and remain bone dry (crispy!), which are the exact conditions you need for something like pizza crust.

Another benefit: Pizza will rarely burn on a stone. More precisely, the crust will burn before the bottom will, so even though you can’t see it, you don’t have to stress out that the bottom is burning while it sits on the blazing hot stone.

HOW TO USE A PIZZA STONE

The pizza stone should come with instructions, but here’s an overview:

  • PREHEAT. A pizza stone has to be preheated. Always place your stone in a cold oven, then dial up the heat. This enables the stone to absorb heat evenly. In addition, a cold pizza stone placed in a hot oven can shatter.
  • HOT, HOT, HOT. Preheat the stone in a 450°F oven.
  • PADDLE. Once the stone has reached the proper temperature, it is too hot to handle with a conventional oven glove. That’s why you need a wooden pizza paddle, which slides underneath the pizza and can also be used to remove the stone.
  • SEASONING. A pizza stone needs to be seasoned first, so that when oil from the pie seeps into it, the stone is clean. It should develop a nonstick patina over time.
  • USE A PADDLE. The paddle brings your pie from the counter top to the stone in the oven, removes it when cooked, and also can remove the hot stone from the oven.
  •  

    HOW TO CLEAN A PIZZA STONE

  • A bench scraper works well, particularly for removing hardened bits of melted cheese.
  • Most stones are dishwasher safe, and can also be wiped with a non-chemical cleaner.
  • Bear in mind that a pizza stone will pick up conditioning and beauty marks as you use it. Don’t worry about it being spotless, and don’t worry about bacteria: Pizza bakes at temperatures hotter than any bacteria or foodborne illness can withstand.
  •  
    THE PIZZA PADDLE

    If you want to make pizza with minimal muss and fuss, you should also own a pizza paddle. Then, along with the pizza stone, you’re ready to compete with the local pizzeria.

    The paddle, dusted with a bit of semolina flour or cornmeal, is the most effective way to get the raw, stretched pie onto the stone.


    Growing oysters off the coast of Louisiana. Photo courtesy Louisiana Seafood News.


  • Stretch an edge of the dough over the lip at the end of the paddle. When putting the pizza into the oven, touch this dough edge to the stone first.
  • It should stick to the stone and allow you to carefully slide the paddle out and leave the pizza behind. (Don’t worry; it takes a little practice to yield pretty pizzas.)
  •  
    Without a paddle to build on, it’s challenging to move the pie to the hot stone from whatever surface you’ve built it on.

    WHAT ELSE TO DO WITH A PIZZA STONE

    Beyond making a pie from scratch, a pizza stone is perfect for getting any number of dough-related items especially toasty and delicious; just think of the idea pizza, and apply that to:

    Canapés: Small appetizers like crackers and crostinis can get soggy if they sit with toppings longer than intended. A quick trip into a 350°F oven on a pizza stone will bring them back to life, strengthening the base and rewarming the toppings. Make bubbly, mini tuna melts on brioche rounds; remove and plate with ease using a spatula.

    Cookies: Picture your favorite chocolate chip (or other) cookie, hot from the oven, with a crispy bottom and a soft top, chocolate chips all gooey. A minute or two on a pizza stone will give you just that. Bonus: A crispy bottom stands up particularly well to a milk dunking!

    Cold/Leftover Pizza: Never again use a microwave to reheat your pizza, and that overly chewy crust that stretches like taffy will become a thing of the past! Five minutes on a hot pizza stone will have your slice tasting like it did when it arrived at your front door or your table at the pizzeria.

    Pastries: A danish, scone, or other sweet pastry will get hot without getting soggy if you put it on a pizza stone. Keep an eye on pastries with fillings or glazes, as they will conduct heat more quickly and need less time than you might think.
    Sandwiches: Open faced or closed, a hot sando made (or simply finished) on a pizza stone is unmistakably the most delicious way to enjoy it. The bread will get as crispy as possible, helping strengthen it for wetter fillings and condiments. Starting a grilled cheese open faced on a pizza stone helps get the cheese brown and bubbly, adding another layer of flavor to the sandwich when you put your two halves together.
      

    Comments off

    GIFT: Tea For Wine Lovers


    A great gift for those who love both tea and wine. Photo courtesy Vintage Teaworks.

      There’s a way to do just about anything, including making wine from tea (by fermenting brewed tea).

    The folks at Vintage TeaWorks take another approach to tea and wine, creating tea blends flavored with natural ingredients that evoke different varietals of wine.

    The results don’t taste like wine, but have aromas and palate nuances that are reminiscent of four different varietals:

  • Black Tea Merlot
  • Green Tea Sauvignon
  • Oolong Chardonnay
  • Puerh Cabernet
  • Rooibos Noir
  • White Tea Riesling
  •  
    The blends are also attractive, with flowers and armomatics mixed in. A giftable tube of 3.5 ounces of tea is $16.99.

    Purchase them online at VintageTeaworks.com.
     
    Discover the world of fine tea in our Gourmet Tea Section.


    Comments off

    TIP OF THE DAY: Bake Shortbread Cookies

    If you only bake one type of cookie this season, bake shortbread. Buttery cookies beloved by both children and adults, shortbread is accessible yet sophisticated.

    Dipped into chocolate, the cookie becomes even more beloved.

    Serve them to guests, keep the stash for yourself, give it as gifts.

    This particular recipe, from GoBoldWithButter.com, a website of the Wisconsin Milk Marketing Board, is a great way to start. If you don’t have hazelnuts, use almonds, macadamias, pecans, pistachios or walnuts.

    CHOCOLATE HAZELNUT SHORTBREAD RECIPE

    Ingredients

    Makes 4 dozen cookies.

  • 3/4 cup (1½ sticks) unsalted butter, softened
  • 1/4 cup granulated sugar
  • 1/4 cup packed light brown sugar
  • 1 teaspoon vanilla extract
  • 1 3/4 cups all-purpose flour
  • 1 teaspoon salt
  • 1/2 cup skinned toasted hazelnuts, finely chopped
  • 4 ounces (2/3 cup) semisweet chocolate
  •  
    Yummy hazelnut chocolate cookies are also things of beauty. Photo courtesy GoBoldWithButter.com.
     

    Preparation

    1. BEAT butter, sugar and brown sugar until light and fluffy. Mix in vanilla. Gradually add flour and salt, and mix just until combined. Stir in hazelnuts.

    2. FORM dough into a disc and wrap in plastic wrap. Refrigerate for about 30 minutes.

    3. PREHEAT oven to 350°F. Line baking sheets with parchment paper or silicone liners.

    4. ROLL out dough into a disc about 1/4-inch thick. Using a sharp knife, cut out cookies into 1×2-inch bars. Carefully transfer cut cookies onto prepared pans.

    5. BAKE, one pan at a time, for 12-15 minutes, or until cookies are lightly browned. Cool on pans for about 10 minutes. Then, transfer to wire racks to cool completely.

    6. PLACE chocolate in a microwave-safe bowl. Heat in microwave at half power in 30-second increments until chocolate melts when stirred. Dip cookies partially into chocolate or drizzle chocolate over cookies. Allow chocolate to set completely, refrigerating cookies if necessary.

    The history of shortbread cookies and how they got the name “shortbread.”

    Find more of our favorite cookie recipes.


    Comments off

    GIFT: Cupcake Of The Month Club


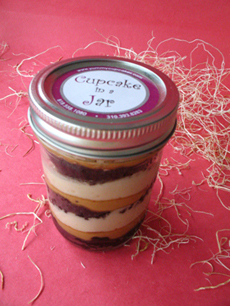
    What we want for Christmas: Yummy Cupcake’s Cupcake Of The Month Club. Photo by GG Merkel | THE NIBBLE.
      At the top of our favorite cupcakes list are Yummy Cupcakes, a Los Angeles bakery that we‘re lucky hasn’t opened up down the block from us. Otherwise, we’d be creating a new 12-step program: Cupcake Addicts Anonymous.

    If you can’t pop in to the L.A. stores, they’ll mail Cupcakes in a Jar—a NIBBLE Top Pick Of The Week—that are even better than cupcakes in a paper wrapper.

    Cupcakes in a Jar are hand-crafted cupcakes in a glass Mason jar, sliced and layered with fresh fillings, whipped frostings, ganache and a selection of scrumptious toppings.

    The reusable jars keep the moisture in, and the jar cupcakes, which have much more frosting than convention cupcakes, stay fresh for a week. You can have just a nibble a day, or more.

    YUMMY CUPCAKES’ “JAR OF THE MONTH” CLUB

    Six- or 12-month memberships are available for $21 to $24 monthly, plus shipping. The lucky giftee will receive a four-flavor assortment, a rotating mix of classic and seasonal specialty flavors.

    Order yours at YummyCupcakes.com.


    Comments off

    TIP OF THE DAY: Flavored Egg Nog

    Yesterday we provided four ways to make low calorie egg nog.

    Today, calories be damned. Here are the real deal, classic egg nog, along with four wonderful flavored egg nog variations.

    FULL STRENGTH EGG NOG RECIPES

    If you’re not counting calories, take a look at these delicious recipes:

  • Classic Egg Nog
  • Chocolate Egg Nog
  • Coconut Egg Nog
  • Egg Nog White Russian
  • Vanilla Egg Nog
  •  
    Here’s how to make flaming egg nog.

    While it’s quite elegant, you don’t need a punch bowl and handled cups to serve egg nog. Use whatever glasses you have, and pour the nog from a pitcher.

     
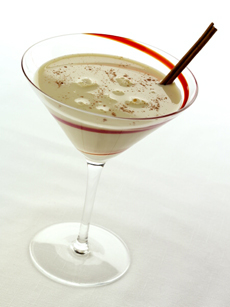
    Egg nog, always festive, is even more so in chocolate, coconut or other flavors. Photo courtesy Wisconsin Milk Marketing Board.
     

    MORE EGG NOG DELIGHTS

    Egg nog doesn’t need to stay in a glass. Here are options from cookies to truffles:

  • CAKE: Egg Nog Pound Cake
  • COOKIES: Egg Nog Wreath Cookies
  • FUDGE: White Chocolate Egg Nog Fudge
  • TRUFFLES: White Chocolate Egg Nog Truffles
  •  
    THE HISTORY OF EGG NOG

    Who invented egg nog? The facts aren’t clear, but here’s the egg nog history as we know it.


    Comments off

    The Nibble Webzine Of Food Adventures
    RSS
    Follow by Email


    © Copyright 2005-2024 Lifestyle Direct, Inc. All rights reserved. All images are copyrighted to their respective owners.