Bake Red Velvet Cheesecake Brownies, With Or Without Sugar
|
|
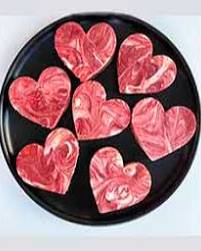
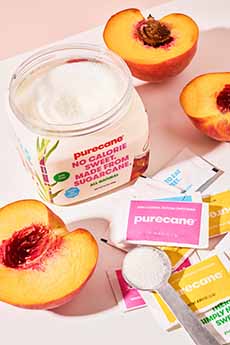
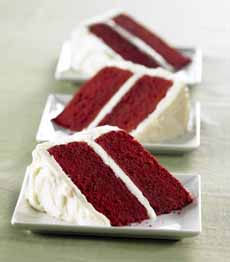
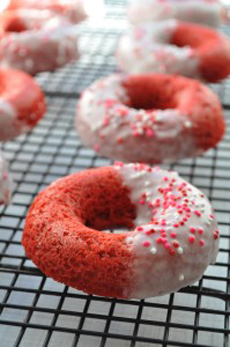
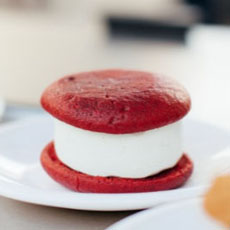
With home baking exploding during the pandemic, more of us will be motivated to bake something special for Mother’s Day. This delicious recipe was made with Purecane zero calorie sweetener, but you can substitute table sugar on a 1:1 basis. It’s that easy, and the brownies freeze well, too. If you don’t have a heart-shape cookie cutter, just slice rectangles like conventional brownies. Thanks to Thomas John and Purecane for the recipe. 1. PREHEAT the oven to 350°F. Grease a 10″x15″ cookie sheet with butter, or line with parchment paper. 2. WHISK together in a large bowl the dry brownie ingredients: flour, Purecane, cocoa powder, salt and baking powder. Set aside. 3. WHISK together in a medium bowl the wet brownie ingredients: eggs, vegetable oil, 2 tablespoons milk, vanilla extract, red food coloring and white vinegar. 4. MIX together the dry and wet ingredients, until completely combined. The batter will be a really thick, moldable texture. 5. REMOVE 3/4 cup of the batter and place it in a medium bowl. Whisk in the remaining 3 tablespoons of milk (into the 3/4 cup of batter you just took out). Set aside the 3/4 cup batter. 6. POUR the remaining batter into the prepared cookie sheet. Using a spatula, smooth out the batter to reach all the edges. 7. BEAT the cream cheese and 3/4 cup Purecane in a stand mixer until fluffy, about 2 minutes. Add the eggs and vanilla, beating until combined and there are no lumps. 8. POUR the cream cheese mixture on top of the red velvet layer and smooth the mixture until it touches all the edges. Drop spoonfuls of the remaining red velvet batter (that you mixed with milk) onto the top of the cheesecake layer. Drag the tip of a knife through the red velvet and the cheesecake layers to create swirls. 9. BAKE for 20 minutes*, rotating halfway through, or just until the center is set and it no longer jiggles. Let cool completely on a wire rack before cutting. 10. USE a medium sized heart cookie cutter to create the perfect Valentine’s Day treat! Tip: Place the cookie sheet in the fridge for about 30 minutes prior to cutting, and make sure the cookie cutter is wiped clean between each cut. “The history of red velvet is not black and white,” says Deborah Harroun, author of the recently published Red Velvet Lover’s Cookbook. Stories detail its discovery in the 1870s in Canada and in the 1950s in Pennsylvania. Some give credit to the Deep South, where red velvet cake is topped with cream cheese frosting. Originally made from beets or beet juice and cocoa (and the best recipes still are), the cake yields a reddish brown color with a mild chocolate flavor. Today’s recipes made with red food coloring can be a florid red. A thick white frosting is traditional (we vote for cream cheese!). Today, many recipes use red food color instead of beets, which leaves a rosy red and arresting color but a more bland flavor and texture. A light-textured chocolate layer-type cake with a deep reddish brown color. Our first experience with red velvet cake, long before the craze of the last decade, was a type of chocolate cake with red food coloring. Our mom baked a recipe called Red Devil’s Food Cake from the 1950s. But think again, says Deborah Harroun: “The cocoa taste actually appears as just a hint when done correctly. I say that a red velvet cake or cupcakes taste like butter cake with just a hint of cocoa. It may be a hard flavor to describe, but once you’ve had it, you probably won’t forget it!” And while many committed bakers deride red velvet for its use of “fake” red food coloring, there are natural ingredients that can be used to achieve the same red hue: cranberries, other red berries, pomegranates. Mom used beets in her Red Devil’s Food Cake. And what a great cake it was! |
|
|
________________ *The shorter baking time, says Thomas John, is “because it’s a mix of brownie and cheesecake batter. The recipe we modified originally stated 30 minutes, however, some recipes bake slightly different with Purecane. When we baked these, the center set at 20 minutes and you don’t want to overbake them since they continue to bake a little after you pull it out of the oven. I recommend keeping an eye on it.”
|
||