TIP OF THE DAY: 3-D Animal Crackers
|
If you like to bake cookies, try your hand at something different: 3-D cookies.
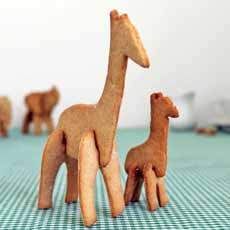
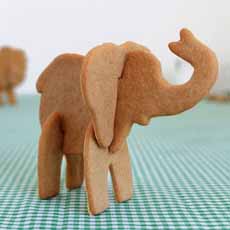
They’re sold by a British novelty products company called Suck UK (why ask why?), and available on Amazon. The zoo animal cookie cutter set contains a mother and baby. Each set has four cutters: two bodies and two pairs of legs, large (mom) and small (baby). Cut out the cookie dough, bake, then slot the pieces together. The larger cookie is 7″ tall by 4.5″ wide. Instructions are included. For Valentine’s Day, you can affix a candy heart with icing. *We couldn’t find the giraffe on Amazon, but found it on another site, a bit more expensive. Americans grow up on animal crackers. But the concept actually originated in England in the late 1800s, as animal biscuits (the British term for cookies). In 1889, when P.T. Barnum toured England with his circus, several manufacturers took advantage of the marketing opportunity and named their animal biscuits “Barnum’s.” The animal biscuits were exported to America, inspiring local bakeries to make their own. The National Biscuit Co. (today, Nabisco), introduced theirs in 1902 as “Barnum’s Animals” (they added the word “Crackers” in 1948). The “circus car” box with the string handle was introduced later in the year, as a Christmas tree ornament for Christmas 1902. (Neither P.T. Barnum nor the Barnum & Bailey Circus ever got a cent in licensing fees from any “Barnum’s” crackers or biscuits. Where were their lawyers?) |

|
|

|
RECIPE: ANIMAL CRACKERS
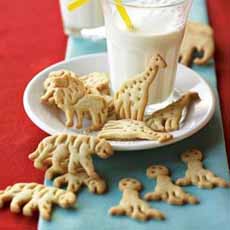
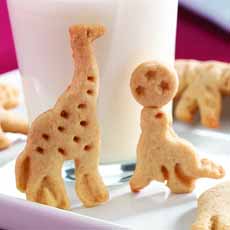
If you have an animal cookie cutter hanging around, here’s a recipe for that animal cracker taste, from Williams-Sonoma Kitchen. They used a set of plunger animal cookie cutters that create the marks on the cookies. Those cookie cutters are no longer available, but we found something similar on Amazon. Alternatively, you can: Ingredients For 20† Cookies ________________ †The number of cookies will vary based on your cookie cutter size. Preparation 1. SIFT together the flour, baking powder, salt, nutmeg and mace over a small bowl. Set aside. 2. FIT an electric mixer fitted with the flat beater and beat the butter on high speed for 2 minutes. Reduce the speed to medium, slowly add the sugar and beat for 2 minutes, stopping the mixer occasionally to scrape down the sides of the bowl. Add the egg and vanilla and beat for 1 minute, stopping the mixer once to scrape down the sides of the bowl. 3. STOP the mixer and add half of the flour mixture. Beat on low speed until most of the flour has been incorporated. Add the remaining flour and beat until all of the flour has been absorbed and the dough starts to pull away from the sides of the bowl, 2 to 3 minutes. |
|
|
4. TURN the dough out onto a work surface and divide into 2 equal balls. Shape each into a disk and wrap separately in plastic wrap. Refrigerate for at least 2 hours or up to 2 days. When ready to bake… 5. PREHEAT the oven to 350°F. Let the dough stand at room temperature for 5 minutes. Place each dough disk between 2 clean, large pieces of plastic wrap. Roll out the dough to 1/8-inch thickness. (If the dough cracks while rolling, let it stand at room temperature for 5 to 10 minutes more.) Remove the plastic wrap and place the dough on a floured work surface. Lightly dust the top of the dough with flour. 6. LINE several baking sheets with parchment paper. Dip the cookie cutters into flour just before using and cut out the shapes. With plunger cookie cutters: Hold each cutter over a prepared baking sheet and lightly depress the plunger to remove the cutout; the plunger will also imprint the tops of the cookies. With regular cookie cutters: Place the cut-out shapes on the baking sheet one at a time and decorate as desired with a toothpick. 7. FREEZE the baking sheets for 15 minutes, or refrigerate for 30 minutes. Gather up the scraps, reroll and cut out more cookies.
|
||


