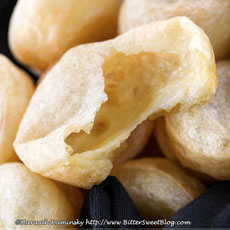
TIP OF THE DAY: Brazilian Cheese Bread, Pão de Queijo
|
On a recent trip to a churrascaria to indulge in the salad bar, our colleague Hannah Kaminsky discovered something more memorable than the jumbo asparagus and whole cloves of caramelized garlic: pão de queijo, Brazilian Cheese Bread. Not a conventional bread (no kneading required), pão de queijo (pow de KAY-zoo) is a Brazilian variation of gougères (goo-ZHAIR)—airy cheese puffs made from savory choux pastry mixed with grated Gruyère cheese. A key difference: Pão de queijo is made from gluten-free flour, either yucca (a.k.a. cassava or manioc) or tapioca flour. This makes pão de queijo gluten free, and also more dense and chewy (much like savory, baked mochi, Hannah notes). They’re delicious with beer, wine and cocktails. Ingredients For 2 Dozen Puffs 1. PREHEAT the oven to 450F. Lightly grease two mini muffin pans. 2. COMBINE the milk, oil, and salt in a 2-quart saucepan and bring to a gentle boil over medium heat, whisking occasionally until large bubbles form. 3. REMOVE the pot from the heat and add the flour, stirring until it is fully incorporated (it will be gelatinous and grainy). You don’t need to worry about over-mixing the dough, since there’s no gluten to toughen. Pause as needed to scrape down the sides of the blender to ensure that everything is thoroughly incorporated. Once the dough is completely smooth… 4. TRANSFER the dough to the bowl of a mixer fitted with a paddle attachment. Beat at medium for a few minutes until it is smooth. When it is cool to the touch… 5. WHISK the eggs in a small bowl; then mix into the dough on medium speed. Incorporate half of the eggs first, incorporate fully and add the second half. 6. BEAT in the cheese with the mixer on medium. The dough will become very sticky. 7. DISPENSE the dough into the muffin cups, filling 3/4 of the way to the top. Dip your spoon or scoop in water to prevent sticking. 8. LOWER the heat to 350°F and bake for 25-30 minutes, until puffy and lightly golden. Remove from the oven and let cool on a rack for a few minutes. Don’t be alarmed if some of the centers fall as they cool. 9. ENJOY them warm and crisp. Leftover puffs can be kept in an airtight container for up to a week and re-crisped in a warm oven or toaster oven. |

|
|
|
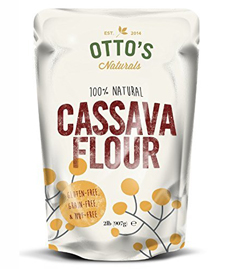
CASSAVA FLOUR VS. TAPIOCA FLOUR: THE DIFFERENCE Both cassava flour and tapioca flour are made from the cassava root. However, the process and end result differ. They can be replaced for wheat flour on a 1:1 basis in many recipes. Note, though, that when mixed with liquid, the dough turns gelatinous and sticky. Keep a bowl of water and paper towels handy for rising your fingers and utensils. You can find these flours in health food stores and natural food stores such as Whole Foods Markets; and of course, online. |
||


