FOOD HOLIDAY: A Caramel Popcorn Pie For National Pi Day
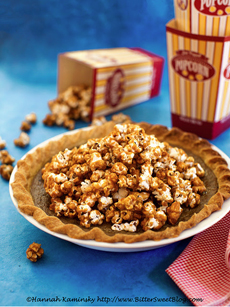 Caramel custard popcorn pie with a caramel corn topping. Who can resist? Photo © Hannah Kaminsky | Bittersweet Blog. |
March 14 is National Pi Day: 3.14 (get it?). And this is a very special National Pie Day: It’s 3.14. (actually, 3.14159265359, so next year will be the full-on Pi Day, 3.14.15). The next “double pi day” won’t be until March 14, 2114. So celebrate double pi day while you can.
Food enthusiasts have co-opted the day as “pie” day—any excuse for a piece of pie! (And for this special year, two pieces of pie.) One of our favorite bakers, Hannah Kaminsky of Bittersweet Blog, developed this terrific fusion: caramel corn atop caramel custard pie. “For all the love that popcorn wins as a standalone snack,” says Hannah, “it strikes me as a huge failure of creativity that there aren’t more attempts at popcorn cupcakes, popcorn cookies or popcorn pies. “Luckily, with a bit of custard and caramel, this is a problem we can fix. In this pie, notes of burnt sugar compliment a buttery undertone, accented with a good pinch of salt. If you’re craving popcorn, it might be a wise idea to think inside the crust.” A tip from Hannah: The caramel corn topping takes a bit longer to bake than the pie itself, so your best bet is to prepare it in advance. Preheat the oven to 225°F and line a jellyroll pan with a piece of parchment paper or a Silpat. |
|
|
Note that you will be making two four-cup batches of caramel corn: one for the custard pie filling and one for the topping (and extra snacking). RECIPE: HANNAH KAMINSKY’S CARAMEL CORN PIE Ingredients For 8 To 12 Servings For The Crunchy Caramel Corn Topping |
||
|
Preparation 1. MAKE the caramel corn (see popping tips below.) Then place the first four cups of popped corn in a large bowl near the stove. 2. COMBINE the brown sugar, butter, agave and salt in a medium saucepan over moderate heat. Stir well and bring to a boil. Cook at a vigorous bubble while stirring continuously for 5 minutes. Remove the pan from the heat and quickly stir in the baking soda. It will foam and bubble angrily, but don’t just stand around and watch it: Make haste and pour the mixture all over the popcorn. Toss to coat each and every kernel, and spread the syrupy corn out in an even layer on the prepared baking sheet. 3. BAKE for about 1 hour, stirring every 15 minutes. It will become perfectly crisp once cool, so despite the tempting aroma, resist the urge to take a bite until it reaches room temperature. 4. REMOVE the popcorn from the oven and increase the oven temperature to 325°F. 5. MAKE the custard filling by combining the second measure of popped corn with the milk in a medium saucepan over moderate heat. Bring the mixture to a boil, cover and turn off the heat. Let sit for 1 hour for the corn to soften and infuse into the liquid. |
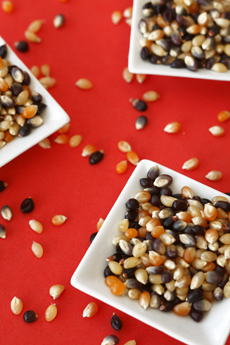 Sure, you could use pre-popped caramel corn. But for the freshest flavor, pop your own. Photo of heirloom popcorn kernels by Katharine Pollak | THE NIBBLE. |
|
|
6. TRANSFER the popcorn milk to a blender or food processor and thoroughly purée. Process at least 5 full minutes at high speed to break down the kernels as much as possible, longer if necessary. Strain through a fine mesh sieve, pressing to get all the liquid out. Discard the solids. 7. POUR the popcorn milk back into the medium saucepan and vigorously whisk in all the remaining ingredients for the filling. When perfectly smooth, turn on the heat to medium and bring to a boil while stirring continuously, scraping the bottom and sides of the pan to prevent the mixture from burning. Once the mixture has thickened to the point that the bottom of the pan remains visible when you stir—without the filling immediately flowing back over the surface—turn off the heat and quickly transfer the filling to the unbaked pie shell. 8. BAKE until the custard is set and browned on top, about 45-50 minutes. The center should still be a bit jiggly when tapped, much like a cheesecake. Let cool completely and top with a generous mound of the crunchy caramel corn topping before serving at room temperature. 1. PLACE the popcorn kernels in a medium-size brown paper bag. If you’re not sure if the bag is big enough, err on the side of caution and pop the corn in two separate batches. Use cellophane or masking tape to seal the bag shut, and put it in the microwave. 2. SELECT the “popcorn” setting if available, or set the timer for 3½ minutes at full power. 3. LISTEN carefully: When the popping slows to about once every 3 seconds, remove the bag. Open it very carefully, making sure your hands and face are out of the way—the steam can be quite hot. Sift out any unpopped kernels. |
||

