December 6, 2013 at 7:42 am
· Filed under Christmas, Recipes, Spreads-Dips-Salsa
|
Instead of hummus, consider this equally nutritious, healthful and tasty beet and bean dip.
Beets are one of the world’s healthiest foods, with a mix of powerful antioxidants that help to protect against heart disease, birth defects and certain cancers.
Beans are rich in protein, fiber, iron and B vitamins and are beneficial to digestive tract health. Beans are healthy carbs—a low-energy-dense food, which means they have a low calorie ratio to the serving size.
Serve the dip as a snack or hors d’oeuvre with crudités, pita chips or other crackers; or as part of a light lunch. The recipe is courtesy LoveBeets.com, whose ready-to-eat beets make this recipe a snap. Prep time is just 10 minutes.
|
|

Colorful beet hummus. Photo courtesy
LoveBeets.com. |
RECIPE: BEET AND BEAN DIP
Ingredients For 4-6 Servings
8.8 ounces cooked beets dipped in vinegar* (we used 1 container Mild Vinegar Love Beets)
1 can (about 14.5 ounces) butter beans (baby lima beans) or white beans†, drained & rinsed
1-2 cloves garlic, crushed
Small bunch fresh chives, finely chopped (reserve some for garnish)
3 tablespoons extra virgin olive oil
Sea salt and freshly ground black pepper
*You can toss conventional cooked beets in wine vinegar.
†You can substitute white beans: cannellini, great northern or navy beans. See the different types of beans.
|

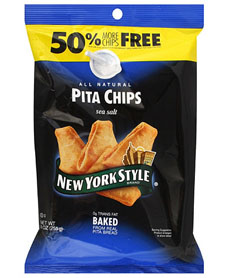
If you like a saltines and similar crackers,
try these pita chips from New York Style.
We’ve become addicted to them. Photo
courtesy New York Style. |
|
Preparation
1. CHOP the beets into small dice; set aside in a medium bowl.
2. PURÉE the beans in a food processor with the garlic, chives and olive oil. Season to taste with sea salt & freshly ground black pepper.
3. TRANSFER to the bowl with the beets and gently fold through to mix. Scoop into a serving bowl and garnish with a drizzle of extra virgin olive oil and some snipped chives.
COOKED VS. DRY BEANS
Despite the convenience of cooked beans, if you want the most nutritive value, you need to use dry beans. It’s easy to do.
Health Reasons
Lower sodium. Canned beans are high in sodium; dry beans have none. There is far too much salt in prepared foods. Do what you can to cut back on it.
|
|
Preservative-free. Canned beans have enough added preservatives to last five years on the shelf. Dry beans have none (yet they last twice as long—up to 10 years in a cool, dry place!).
BPA-free. Studies suggest that the controversial chemical Bisphenol A, found in the plastic white lining of most cans of food and in some plastic beverage bottles, may contribute to certain cancers, insulin resistance and birth defects.
More Reasons
Environment. Dry beans use less packaging than cooked beans, lowering the waste sent to landfills.
Cost. Dry beans are much cheaper per serving than canned beans; and if you buy them in bulk from the bin, even more so.
Texture and flavor. Canned beans are mushier and more bland. If you cook dry beans, you can make them as firm as you like.
HOW TO COOK DRY BEANS
It’s easy to get in the dry bean groove. All you need to do is:
Plan ahead. Soak beans overnight or for at least eight hours (e.g., before you leave for work).
Use a pressure cooker. No soaking is required and they’ll cook in 20 minutes instead of an hour or more on the stove top.
Here’s the drill.
Sort the beans. Place them on a kitchen towel or in a shallow pan; pick out and discard any broken or shriveled beans, pebbles, etc.
Rinse the beans. Rinse them thoroughly under cold, running water.
Soak the beans. Soaking helps to remove some of the indigestible sugars that cause flatulence. Place the beans in a large bowl and cover with 2 to 3 inches of cool, clean water. Leave at room temperature for eight hours or overnight; drain well. NOTE: If you have a hot kitchen, soak the beans in the fridge to avoid possible fermentation.
Quick soak alternative. Place the beans in a large pot and cover with 2 to 3 inches of cool, clean water. Bring to a boil and boil briskly for 2 to 3 minutes. Cover and set aside off of the heat for 1 hour; drain well.
Cook the beans. Place beans in a large pot and cover with 2 inches of water or stock; don’t add salt at this point since it will slow the softening. Slowly bring to a boil, skimming off any surface foam. Reduce heat, cover and simmer, stirring occasionally. Add more liquid as necessary, until beans are tender when mashed or pierced with a fork. Add salt in the final stages of cooking. Cooking times vary with the variety, age and size of beans. Plan for 1 to 2 hours.
Enjoy those tasty, healthful, inexpensive beans.
|
Please follow and like us:
Permalink
Comments are closed.


