THE NIBBLE BLOG: Products, Recipes & Trends In Specialty Foods


Also visit our main website, TheNibble.com.


TIP OF THE DAY: Mixing Bowls = Serving Bowls

Our favorite mixing bowls are available
at Amazon.com.

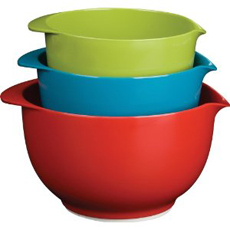
Some of the mixing bowls on the market are so good-looking, they can go straight to table. There’s no need to use (and wash) a separate “serving dish.”

We use these stacked melamine bowls in THE NIBBLE kitchen. Who cares that they have a spout: They add bright color to the table when filled with salad, pasta, soup, sides and especially, chips, popcorn and other snacks.

Stainless steel, glass and ceramic (pottery) mixing bowls also do handsome double duty at the table.

If you need to give a house gift to new homeowners, give them something they’ll really use. Consider a set of good-looking mixing bowls. Check out:


Comments off

PRDUCT: Haamonii Shochu

Do you know shochu?

Like vodka, it’s a grain-neutral spirit—in this case, distilled from barley, brown sugar, buckwheat, rice or sweet potatoes, instead of the potatoes, wheat or rye most often used for vodka. Like vodka, it isn’t aged, and thus it can be infused with a variety of flavors.

But it has half the calories of vodka, and a fine artisan vodka is smooth with no burn—great for sipping.

Shochu dates back at least to the 16th century. It is most often used in mixed drinks, but some artisan shochus are smooth enough for straight sipping.

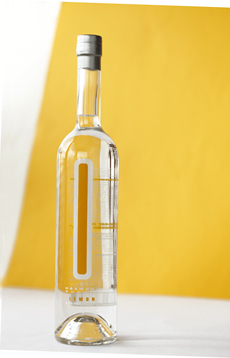
We recently tried Haamonii “ultra premium” shochu, smooth as silk. The Haamonii Lemon Shochu is a special treat: It has the nose of lemon-infused vodka, and the palate of a sweet lemon-vodka cocktail.

  • Read the full review to learn all about shochu, ways to use it and of course, cocktail recipes.
  • Check out our Cocktails & Spirits section for more of our favorite drinks.

Haamonii shochu is indeed harmonious.
Photo by Katharine Pollak | THE NIBBLE.

Comments off

TIP OF THE DAY: Meat Thermometer

A meat thermometer takes the guesswork
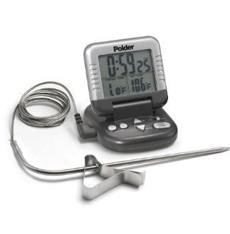
out of cooking. Photo courtesy Polder.

You don’t have a meat thermometer? How do you know when the meat is cooked?

One technique, used by many, is the cut-and-view approach, slicing into the meat to see the color of the inside. This is a bad idea: It ensures that valuable juices dribble out from the cut mark.

Other people use the chef-honed technique of pressing a finger on the meat to discern the degree of doneness. This works with pan-cooked meat, but this doesn’t work with chicken or oven roasts.

That’s why good cooks rely on a meat thermometer (not an oven thermometer, which is to ascertain the exact temperature in the oven since oven dials are often inaccurate). It can also be used to check the temperature of other dishes, such as eggs and casseroles.

(For deep-frying or candy/sugar work, you’ll need a separate candy thermometer. Not only does it measure higher temperatures, but it’s more sensitive to gradations: sugar and fat get hot more quickly than meat.)

For not very much money, a meat thermometer takes the guesswork out of cooking. It provides critical information that cooks food to a safe temperature and prevents overcooking.

What type of meat thermometer do you need?

  • Basic Oven-Proof Thermometer. For under $10.00 you can buy a basic meat thermometer, like the classic from Taylor. It’s not digital, but you don’t need to know that your meat is, for example, 160.4 degrees versus 158 degrees. It is inserted into the food at the beginning of cooking. If you forget, you can insert it toward the end of cooking and wait half a minute for the dial to adjust.
  • Digital Thermometer. (Photo at top left.) For twice the price, the digital Polder Classic Cooking Thermometer has a timer that can be used separately (as a general kitchen timer), shows temperatures in both Farenheit and Celsius, lets you set a five-minute alarm prior to the end of cooking and has magnets for mounting on the side of the oven. There are varieties that can be inserted into the meat when you want a quick read, as well as those that get inserted at the beginning and remain throughout the cooking process.
  • Microwave Thermometer. Do you cook meat in the microwave? There are microwave-safe thermometers for you.


Pop-Up Thermometers. Developed for roasting whole poultry, these are no-brainers. When the chicken or turkey is ready, the top pops up. You can buy a package that will last a year for a little more than $10.00.

Using A Standard Meat Thermometer

1. Insert the thermometer deeply into the flesh. Make sure the thermometer does not touch any bone.

2. Place the meat and thermometer into a preheated oven. About 15 minutes before the end of the stated cooking time, check the thermometer. Then, monitor it until it reaches the desired level of doneness. (If you are pan-cooking, you can insert the thermometer toward the end, but an instant-read thermometer is a better tool.)

TIP #2: Don’t slice the meat or poultry the moment you take it from the heat. Let it sit for 10 minutes. This lets the juices settle so that, upon slicing, they don’t rush out. Whether oven- or pan-cooked, the temperature of the meat will increase by 10 degrees or so as the meat rests, so you’ll want to stop cooking 10 degrees before the recommended “done” temperature.

Comments off

TOP PICK OF THE WEEK: Verjus

For a few years now, verjus (vair-ZHOO) has been adopted in top culinary circles. But few consumers, even those who love to cook, know what it is.

Verjus is the juice pressed from unripe grapes. The name means green juice in French, but the product dates back to at least ancient Rome (where it was called acresta).

Used as a condiment or a recipe ingredient, it provides bright, fresh flavor without the harsh acidity of vinegar or lemon juice. It’s one of our favorite kitchen ingredients.

It’s also a great gift for anyone who loves to cook and for calorie counters.

  • Read the full review to learn why you should try healthy, low calorie and flavorful verjus.
  • You’ll also see why you should buy American verjus—like the Terra Sonoma verjus we used in our recipes—instead of imported products.
  • Find more of our favorite oils, vinegars and salad dressings in our Oil & Vinegar Section.

Use verjus instead of vinegar or citrus on
salad and in many other recipes. Photo by Sarsmis | IST.

Comments off

RECIPE: Summer Citrus Margarita

Add orange juice and grapefruit juice for a
Summer Citrus Margarita. Photo courtesy
El Jimador tequila.

  Margaritas are made with tequila, orange liqueur and lime juice. What happens if you divided the juice into 1/3 lime, 1/3 orange and 1/3 grapefruit?

You have a Summer Citrus Margarita!

This recipe is courtesy of Steve Rice, Vice President of Sales at the Plaza Hotel in New York City. Try it now. It just might become your official Labor Day cocktail.

Ingredients

  • 1 cup orange-flavored liqueur, such as Cointreau or GranGala
  • 1 cup tequila
  • 1/4 cup fresh orange juice
  • 1/4 cup fresh lime juice
  • 1/4 cup grapefruit juice
  • Lime wedges for garnish
  • Margarita salt (this is simply large-crystal salt—kosher salt or coarse sea salt)
  • Preparation
    1. Add first 5 ingredients to a blender and blend.
    2. Moisten rims of glasses and dip into a plate of Margarita salt.
    3. Fill glasses with Margarita. Garnish with a lime wedge. Serve.

    Find more of our favorite cocktail recipes—including a large selection of Margarita recipes—in our Cocktails & Spirits Section.

    Comments off

    The Nibble Webzine Of Food Adventures
    RSS
    Follow by Email


    © Copyright 2005-2024 Lifestyle Direct, Inc. All rights reserved. All images are copyrighted to their respective owners.