TIP OF THE DAY: Make Chocolate-Covered Potato Chips & Pretzels
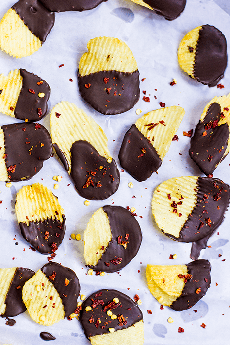
 [1] Chocolate-covered potato chips with a sprinkle of red chile flakes (photo courtesy My Food Story).
|
If you like to give homemade gifts or party favors, how about chocolate-covered potato chips or pretzels? While you can find them at retailers, the concept here is made by you. You can also use quality chocolate, like Green & Blacks or Lindt. If the recipient doesn’t know the difference between a Hershey Bar and a Lindt Bar, default to Nestlé’s chocolate morsels. Package your treats in a nice tin, and voilà! (Note: A square tin is easier to wrap than a round tin.) You can also include a card with tips for enjoying them, beyond eating them for the tin. Ours include: Use a quality potato chip (Boulder Canyon, Deep River, Kettle Brand, etc.), the thicker the better so they don’t break. For an less salty chip, take a look at Kettle Brand’s Unsalted. They also have a Maple Bacon chip that adds an extra layer of flavor. You can also use sweet potato chips. Also take a look at Food Should Taste Good’s sweet potato tortilla chips. They’re slightly sweet, a good pairing with chocolate. As for the chocolate, use dark, milk, white, or a combination. |
|
|
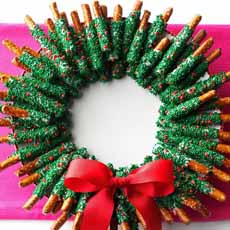
Ingredients You need only three ingredients: 1. SORT the chips and place the whole ones on a work surface. Prepare two large baking sheets with with wax paper or parchment. 2. BOIL the water in a double boiler and reduce to simmering (a heat-safe bowl on top of a pan of simmering water also works). Place three-quarters of the chocolate in the top/bowl and melt, stirring occasionally. When the chocolate has melted, continue to heat it to 110°F, stirring occasionally. To microwave, heat at 45-second intervals until melted, stirring in-between. 3. REMOVE the chocolate from the heat, and stir in the remaining chopped chocolate until melted. Continue stirring until the chocolate has cooled to 90°F. 4. DIP the potato chips into the chocolate one at a time, dipping two-thirds of the way. We use our fingers, but you can use tongs. Allow the excess chocolate to drip back into the bowl by lightly tapping the chip against the edge. Place the chip on the wax paper, beginning at the point farthest away from you, so you won’t drip chocolate on the finished chips. Repeat until all of the chips are dipped. 5. SPRINKLE the chocolate portion with a bit of the seasoning (photo #1), or completely dip into the decorations (photo #2). 6. PUT aside to cool until set, about two hours. Placing the trays in the fridge speeds up the process to 15 minutes (but not longer, or they may become soggy). |
||


