RECIPE: Pumpkin Cheese Danish & The History Of Viennoiserie
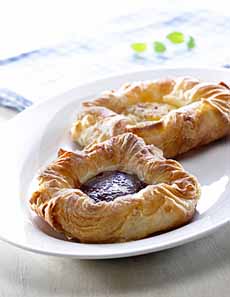
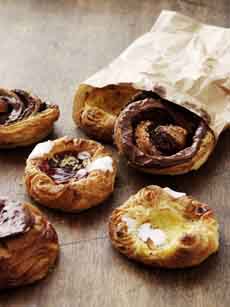 [1] One of the most popular types of Viennoiserie is Danish pastry, typically round with fruit and/or cheese fillings (photo courtesy Visit Denmark).
|
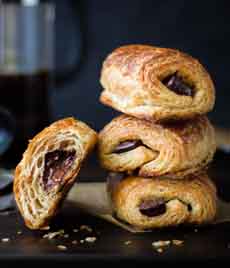
Long before we could say “Viennoiserie” (vee-en-WAH-zuh-ree, meaning “things of Vienna”), we could say “cheese Danish.” We cannot remember a time that cheese Danish was not part of our life. Our nana was a big baker of Viennoiserie; and if she didn’t have time, there were bakeries owned by Austrian and German bakers who had immigrated to New York after World War II. Viennoiserie is the category of what is called breakfast pastry in the U.S. It is made with laminated yeast dough or puff pastry. It includes, among other varieties, croissants, pain au chocolat, pain au raisins and Danish pastry. It bridges the gap between bread and pastry. White flour is combined with ingredients—eggs, butter, sugar, milk, cream—which create a richer, sweeter flavor than brioche, challah or other sweet breads. Active yeast cultures cause the quick rise of the dough, creating the signature flakiness when it is baked. While the laminated dough is known as a pâte viennoise (pot vee-yen-NWAZ, meaning Viennese paste) and originated in Vienna, it grew up in Paris, Viennoiserie arrived in Paris between 1838 and 1839 with August Zang, a former Austrian military officer who opened a bakery, Boulangerie Viennoise. He introduced the Viennese techniques which would one day lead to the baguette and the croissant. The Viennese style of pastry became a passion in Paris, baked almost everywhere. You can explore more pastries in our Pie & Pastry Glossary, and the many varieties of bread in our Bread Glossary. This recipe is from the masterful bakers at King Arthur Flour. It may seem like a lot of steps, but this Danish is something you just can’t find elsewhere. Prep time is 60 minutes, bake time is 18-20 minutes. The dough needs to be made the night before (through step 3, below), so you can pull it together on a lazy Saturday and have warm Danish for Sunday brunch. Ingredients For 12 Danish For The Sponge 1. PREPARE the sponge: Weigh the flour, or measure it by gently spooning it into a measuring cup and sweeping off the excess. Beat together the egg and water then add the sugar, flour, and yeast. Mix until well blended. Cover and set aside for 30 minutes. 2. MAKE the dough: Weigh the flour, or measure it by gently spooning it into a measuring cup and sweeping off the excess. When the sponge is ready, combine the sugar, 1-1/4 cups of the flour, dry milk, salt and pumpkin pie spice. Set aside. 3. STIR the sweet dough flavor and 1 tablespoon melted butter into the sponge mixture, then add the dry ingredients. Mix and knead until a soft, smooth dough forms, adding the additional 1/4 cup of flour if necessary. Pat the dough into a square on a greased baking sheet, wrap it well, and refrigerate overnight. 4. PREPARE the butter the next day. Place the butter in the center of a lightly floured piece of plastic wrap. If you’re using two sticks of butter, place them side by side. Pound the butter with a rolling pin until you have a rough 6″ square. Use the plastic wrap to make the edges straight and even. Wrap the butter and refrigerate it for 30 minutes. |
|
|
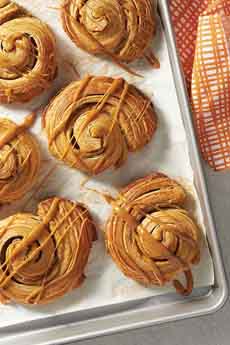
5. LAMINATE the dough: Place the chilled dough on a lightly floured work surface. Roll it into a 9″ square; it doesn’t have to be exact. Unwrap the chilled square of butter and place it in the center of the dough at a 45° angle, so it looks like a diamond in the square. Fold the sides of the dough over the edges of the butter until they meet in the middle. Pinch and seal the edges of the dough together; moisten your fingers with a little water, if necessary. 6. DUST the top of the dough parcel with a little flour, then turn the dough over and tap it gently with the rolling pin into a rectangular shape. Pick up the dough to make sure it isn’t sticking underneath, dusting with more flour if necessary, then roll from the center out until you have a rectangle 14″ long by 7″ wide. Brush off any excess flour with a dry pastry brush then fold the bottom third of the dough up to the center, and the top third over that (like a business letter). Line the edges up on top of each other, and even up the corners so they’re directly on top of each other. Use a dab of water, if necessary, to get the corners to stick together. This is the first “turn.” 7. ROTATE the dough parcel 90° to the right: It will look like a book ready to be opened. If the dough is still cool and relaxed, roll and turn it as instructed in the previous step, then wrap it loosely and refrigerate for 30 minutes. If the dough is springing back when you try to roll it, wrap it loosely and refrigerate it for 30 minutes. Ultimately the dough should be folded and turned four times, so allow it to rest in the refrigerator as many times as necessary to achieve that. Once the four turns have been completed, wrap the dough loosely and refrigerate it for 60 to 90 minutes. 8. MAKE the filling: In a small bowl combine the sugar, pumpkin pie spice, ClearJel or flour, and salt. Set aside. In another bowl… 9. BEAT the cream cheese until smooth. Add the pumpkin and flavor, and beat again until smooth. Mix in the dry ingredients. Set aside. 10. SHAPE the Danish: Roll the dough into a 14″ x 16″ rectangle; if the dough starts to shrink back, let it rest and relax, loosely covered, in the refrigerator for 15 minutes. Trim the edges of the dough on every side using a ruler and pizza wheel. This cuts off the folded edges that would inhibit the pastry from rising fully. 11. SPREAD the filling over the surface of the dough, leaving a 1/2″ bare strip along one of the long edges. Brush the bare strip with a little water. Beginning with the covered long edge, roll the dough into a log. Cut the log into 12 slices and place them on two lightly greased or parchment-lined baking sheets. 12. BRUSH the Danish with 1 large egg beaten with 1 tablespoon of water. Bake the Danish—one pan at a time, or in two ovens—for 18 to 20 minutes, until they’re a deep golden brown. Remove the Danish from the oven and cool on a rack. 13. PREPARE the topping: Melt the caramel over low heat in a small saucepan or in the microwave, heating and stirring until smooth. Drizzle some of the warm caramel over each Danish. You can store Danish in a plastic bag or an airtight container at room temperature for a day; or wrap well and freeze for longer storage. And, the more you make it, the faster you get. |
[3] Another classic shape for cream cheese danish. Here’s the recipe from Alexandra Cooks. |
|
|
|
||
