RECIPE: Peanut Butter Brownie Ice Cream Sandwiches
|
This recipe for peanut butter lovers was contributed by Isabelle Boucher of Crumblog and posted to the recipe section of ILovePeanutButter.com, the website of Peanut Butter & Co.
She used Peanut Butter & Co.’s Dark Chocolate Dreams peanut butter to make the ice cream, and sandwiched it between two layers of brownie. You can also use the homemade chocolate peanut butter ice cream:
You can bake your own brownies (recipe below) or buy them. July 23rd is National Peanut Butter & Chocolate Day.
|
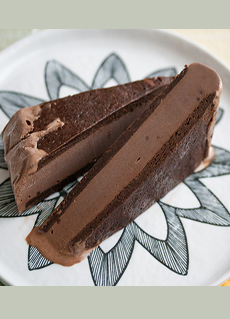
[1] The best thing since the peanut butter cup (photo © Isabelle Boucher | Crumblog). |
|
|
RECIPE: CHOCOLATE PEANUT BUTTER BROWNIE ICE CREAM SANDWICHES Ingredients For 16 Sandwiches For The Ice Cream |
||
 [2] Chocolate is one of the delectable flavors from Peanut Butter & Co. See the other 11 PB flavors. |
Preparation
1. MAKE the ice cream. In a medium saucepan over medium-high heat, whisk together 1-1/2 cups cream, 1/2 cup sugar, cocoa powder and salt. Heat until wisps of steam start to rise from the surface, then remove from heat. 2. WHISK together the egg yolks and remaining 1/2 cup sugar in a large mixing bowl, until smooth. Pour in a ladleful of the warm cream, whisking vigorously to keep the eggs from curdling. Slowly pour in the remainder of the cream, one or two ladlefuls at a time, whisking constantly as you go. Once all of the cream has been incorporated into the eggs… 3. POUR the mixture back into the saucepan. Cook over medium heat, stirring constantly with a heat-proof spatula and scraping the bottom of the pan, until the custard is thick enough to coat the back of the spatula. 4. REMOVE from heat and whisk in the peanut butter, vanilla and remaining 1-1/2 cups cream until smooth. Pour the finished custard into a mixing bowl, and cover with plastic wrap, resting the wrap directly on the surface of the custard to prevent a skin from forming. Refrigerate for at least 1 hour, or until thoroughly chilled. |
|
|
5. FREEZE the ice cream in the ice cream machine, per the manufacturer’s instructions. Scoop into a freezer safe container, and place in the freezer to firm up while you prepare the brownies. (The ice cream can be made up to a week in advance. If you’ve made it ahead of time, let it rest on the counter for about 5 minutes to soften before assembling the ice cream sandwiches.) 6. BAKE the brownies. Preheat oven to 350°F. Lightly grease an 11″ × 17″ jelly roll pan with cooking spray, and line with parchment paper. 7. STIR together the chocolate and butter in a small saucepan set over medium heat, until melted and smooth, about 3-4 minutes. Remove from heat. 8. COMBINE the chocolate mixture in a large mixing bowl with the sugar, vanilla extract and salt; and stir until smooth. Add the eggs one at a time, beating well after each addition, then add the flour and stir until just barely combined. Pour the batter into the prepared pan, and smooth out the top to create a very thin, evenly distributed layer. 9. BAKE in the preheated oven for about 8-10 minutes, or until the brownies are set and shiny on top, but still slightly undercooked. Remove from oven and set the pan on a wire rack to cool completely, about 30 minutes. 10. CUT the brownie layer in half lengthwise to create two long, skinny rectangles, and place in the freezer for 10-15 minutes to firm up. 11. ASSEMBLE the sandwiches: Run a knife along the edge of the pan to loosen the brownies. Carefully lift one of the rectangles out and transfer to a wire rack, leaving the other half on the cookie sheet. 12. USING the parchment, carefully flip over the brownie layer in the pan, so that it’s now top-side down. Remove the parchment paper. 13. WORKING as quickly as possible, spread the ice cream in a smooth, even layer onto the brownie in the pan. Carefully place the remaining brownie on top of the ice cream, doing your best to align the two layers. Wrap tightly with plastic wrap, and transfer to the freezer for at least 2-3 hours, or until completely frozen. When ready to serve… 14. USE a sharp knife to cut into 8 rectangular pieces, then slice each one diagonally to create 16 triangular sandwiches. Serve right away. Wrap any sandwiches you’re not eating immediately in plastic wrap, and store in the freezer until ready to serve or up to 1 month. CHECK OUT WHAT’S HAPPENING ON OUR HOME PAGE, THENIBBLE.COM. |
||

