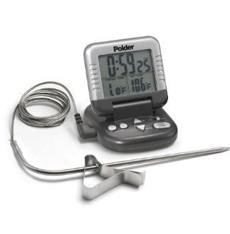
TIP OF THE DAY: Meat Thermometer

A meat thermometer takes the guesswork |
You don’t have a meat thermometer? How do you know when the meat is cooked?
One technique, used by many, is the cut-and-view approach, slicing into the meat to see the color of the inside. This is a bad idea: It ensures that valuable juices dribble out from the cut mark. Other people use the chef-honed technique of pressing a finger on the meat to discern the degree of doneness. This works with pan-cooked meat, but this doesn’t work with chicken or oven roasts. That’s why good cooks rely on a meat thermometer (not an oven thermometer, which is to ascertain the exact temperature in the oven since oven dials are often inaccurate). It can also be used to check the temperature of other dishes, such as eggs and casseroles. |
|
| (For deep-frying or candy/sugar work, you’ll need a separate candy thermometer. Not only does it measure higher temperatures, but it’s more sensitive to gradations: sugar and fat get hot more quickly than meat.)
For not very much money, a meat thermometer takes the guesswork out of cooking. It provides critical information that cooks food to a safe temperature and prevents overcooking. What type of meat thermometer do you need?
Pop-Up Thermometers. Developed for roasting whole poultry, these are no-brainers. When the chicken or turkey is ready, the top pops up. You can buy a package that will last a year for a little more than $10.00. Using A Standard Meat Thermometer 1. Insert the thermometer deeply into the flesh. Make sure the thermometer does not touch any bone. 2. Place the meat and thermometer into a preheated oven. About 15 minutes before the end of the stated cooking time, check the thermometer. Then, monitor it until it reaches the desired level of doneness. (If you are pan-cooking, you can insert the thermometer toward the end, but an instant-read thermometer is a better tool.) TIP #2: Don’t slice the meat or poultry the moment you take it from the heat. Let it sit for 10 minutes. This lets the juices settle so that, upon slicing, they don’t rush out. Whether oven- or pan-cooked, the temperature of the meat will increase by 10 degrees or so as the meat rests, so you’ll want to stop cooking 10 degrees before the recommended “done” temperature. |
||

