TIP OF THE DAY: Make Almond Milk
|
|
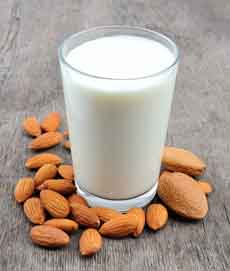
Here’s a fun project for the weekend: homemade almond milk. All you need are almonds, water, cheesecloth and a jar.
Almond milk is a dairy-free milk alternative, favored by the lactose-intolerant, vegans, raw foodists and as a kosher (pareve) milk alternative. Others simply like the creaminess and hints of almond on the palate. Almond milk is the number one nondairy milk in the U.S. It can be used anywhere cow’s milk is used, from morning cereal to afternoon smoothies to after-dinner coffee. (Here’s a nutrition comparison.) In just five minutes (plus eight hours soaking time), you can make a batch, From there, you can make flavored almond milk, like vanilla or cocoa. You can add a sweetener of choice—agave, honey, maple syrup, noncaloric sweetener, sugar—or drink it as is (it has its own natural sweetness). You can even give a cocoa almond milk kit to a child, useful for everything from Show and Tell to inspiring the joy of cooking. |
|
|
But today’s project is making a batch of plain almond milk. Sure, you can buy it ready made. But making your own is not only fun; it tastes a lot better than the manufactured, shelf-stable product, which typically contains additives and preservatives. |
||
|
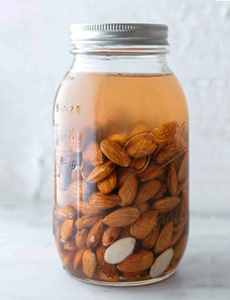
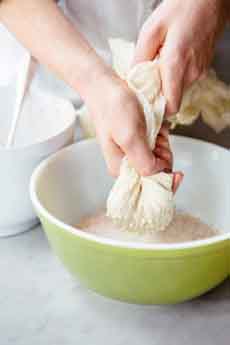
RECIPE: HOMEMADE ALMOND MILK Ingredients 1. PLACE the almonds in a large bowl or jar and cover with cold water by at least an inch. Cap the jar or cover the bowl with a dish towel, and let the almonds soak for at least 8 hours and up to 2 days. The almonds will plump as they absorb water. The longer you soak them, the creamier the milk will be. If you plan to soak them for more than 8 hours or overnight, put the bowl in the fridge. 2. STRAIN the almonds in a colander, thoroughly rinse them with cold water and place them in a blender. Pulse them to break up the almonds. Add 4 cups of water and blend on high until the mixture is very smooth, 2 to 4 minutes. The almonds should break down into a very fine meal and the water should be white and opaque. 3. PLACE the cheesecloth in a large strainer over a bowl. If you don’t have a strainer, gather the edges of the cheesecloth in one hand so as to create a well. Carefully pour the water and almond mixture into the cheesecloth, taking pains to not let any spill out of the sides. When all of the mixture has been poured… 4. SQUEEZE the remaining almond meal in the cheesecloth to extract any remaining liquid. You can wring the cheesecloth to get every last drop. See below for what to do with the leftover almond meal. At this point you can taste the almond milk and sweeten to taste. It has natural sweetness, so we don’t add anything more. 5. STORE the almond milk in an airtight container in the fridge. Since it has no preservatives and isn’t pasteurized, it only keeps for two or three days. Because there are no emulsifiers, the milk can separate. Just shake the bottle. If you’ve had commercial almond milk, you’ll be wowed by the fresh flavor. |

|
|
|
If you’d like a thinner milk, use more water next time; for thicker milk, use less water. If you plan to make almond milk regularly, buy a nut milk bag from a health food store or online. It’s easier to work with than cheesecloth. HOW TO USE THE LEFTOVER ALMOND MEAL You can toss or compost it, of course. But you can also: You can use either a blender or a food processor to make almond milk. The differences: In the Middle Ages, almond milk was made in Europe to East Asia. It was a staple because it kept longer than cow’s or goat’s milk; and it was appropriate for consumption during Lent and fast days.
|
||


