ACADEMY AWARDS RECIPE: Oscar Statue Cookies
|
You’ve got plenty of time between now and Sunday night to bake a batch of these impressive Oscar statuette cookies, developed by Lauryn Cohen of BellaBaker.com. You don’t even have to buy an Academy Award-shaped cookie cutter: Here’s a free downloadable Oscar cookie template and circle for the statuette base.. The recipe makes approximately two dozen coookies. ACADEMY AWARD (OSCAR STATUETTE) Ingredients |
|
|
|
Preparation For Dough The dough can be made in advance and kept in the refrigerator for up to 4 days. 1. WHISK flour, baking powder and salt together in a small bowl. 2. COMBINE cream butter and sugar together in the bowl of a stand mixer and mix on medium speed for 2-3 minutes, until mixture is pale and blended. 3. ADD eggs, one at a time, mixing until eggs and extra yolk are fully incorporated into sugar mixture. Add vanilla extract and beat. Reduce mixer to low and add flour mixture, a little at a time, until dough is fully combined, taking care not to over-mix. 4. DIVIDE into two disks and wrap in plastic. Refrigerate dough for at least one hour, or preferably 2 to 3 hours. |
||
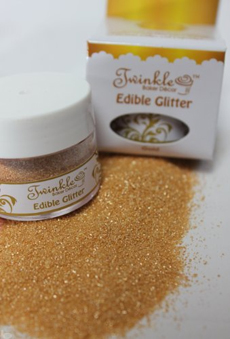
 Coat the royal icing with edible gold glitter: You’re ready to hand out the awards! Photo courtesy The Baker Shop. |
Preparation For Baking 1. PREHEAT oven to 350°F. Remove dough from the refrigerator and let it sit for a minute or two so it is easier to roll out. 2. PLACE dough between two sheets of parchment paper and roll out with a rolling pin to approximately 1/8″ in thickness. 3. CUT out statuette and circles with cookie cutter or template, and place on a baking sheet lined with parchment paper. If you are using the template, simply place it on top of dough and cut around it with a sharp knife. You may already have a 2.5″ diameter circle cookie cutter for the base. If not, look for a small cup or glass to use in its place. 4. CUT slits into the middle of the circle cookies that are big enough to fit the base of the Oscar cookies. Bake 10-11 minutes, or until cookies are just starting to become golden in color around the edges. Remove from oven, and if the slit in the circle cookies has filled in during baking, use a sharp knife to re-cut the slit before the cookie cools. |
|
|
ROYAL ICING RECIPE Ingredients
Preparation 1. MIX all ingredients together for 7 to 10 minutes, until icing stiffens. If icing appears too stiff, add more water, one teaspoon at a time. You want the icing to be thin enough that you can pipe it easily. Tint the royal icing gold (see instructions below) and frost the circle cookies for the base. 2. DECORATE cookies when cool. Place royal icing into a piping bag fitted with a very small round tip. 3. OUTLINE the outside of the cookie. Keep the tip about 1/2 inch above the cookie as you ice. This helps achieve a straighter line. 4. FILL IN or “flood” the cookies, adding about a teaspoon of water to the remaining royal icing until it becomes more of a liquid consistency. Fill a squeeze bottle with the “flood” icing and squeeze the icing inside the outline you just created, so it almost covers the cookie. Then take a toothpick and gently move it around to help fill in the cookie completely. 5. DRY the cookies completely (usually 1 to 2 hours). Then, lightly moisten the surface of each cookie with water using a paint brush. Coat in edible gold glitter. Affix statue to base by inserting statuette cookie into base. 1. PLACE 10 drops of yellow food color in a mixing dish. Add one drop of red food color; mix with a toothpick. 2. TEST the color on a piece of dough or white bread; let sit for 3 minutes to see the color when dried. If the color is too light, add another drop of red to your mixture and retest; if the color is too dark or too orange, add more yellow. 3. BLEND color, a bit at a time, into the royal icing. |
||


