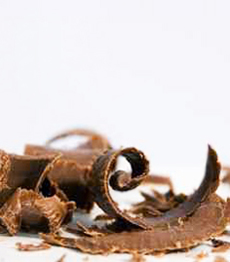
TIP OF THE DAY: Make Chocolate Curls
|
We have lots of chocolate bars and pieces of chocolate that have been nibbled on for reviews, as well as blocks of couverture chocolate (used for baking). When life gives you extra chocolate bars, make chocolate curls. Also known as shaved chocolate, the curls can be used to garnish cake, ice cream, pudding, hot chocolate (or iced hot chocolate), cappuccino or anything that can benefit from a bit of chocolate glamor. You can make dark, milk or white chocolate curls—or a combination. We’re particularly fond of white chocolate curls atop dark chocolate frosting. TIP: If you won’t be using the curls immediately, place them in a storage container instead of on a cookie sheet. |
 Chocolate curls are a pretty garnish that adds an intense bite of chocolate. |
|
|
HOW TO MAKE CHOCOLATE CURLS In addition to the chocolate, you’ll need a vegetable peeler, cookie sheet or storage container (we use a low, square Tupperware-type container), waxed paper and a toothpick (we use tiny tongs that our grandmother used to add saccharine tablets to her tea). For small curls, shave the narrow side of the bar; for wide curls, shave the broad side of the bar. You may have to practice to get the pressure right (maintain a steady pressure and speed). 1. The chocolate bar needs to be softened: hard enough to shave, but not so hard as to be brittle. We put our bar in a cold oven for half an hour, or on the stove top for 10 minutes on each side (to be warmed by the pilot light). 2. While the chocolate softens, cover a cookie sheet or the inside of a square or rectangular plastic storage container with waxed paper. 3. Make the chocolate curls by drawing the vegetable peeler across the chocolate. Don’t use a light touch, as with a potato or carrot. You’ll need a strong and steady stroke. 4. Use the toothpick to lift the curls gently onto the waxed paper. If you’ll be using them shortly, place them in the refrigerator for 15 minutes to harden. Otherwise, store them in an airtight container in a cool place (we keep them near the vent of our kitchen air conditioner). Some people refrigerate them, but the quick transition from cold to a warm room can cause the chocolate to bloom. Once you get the hang of it, we think you’ll be using chocolate curls a lot! MORE CHOCOLATE FUN Check out our Gourmet Chocolate Section for tips, recipes, reviews, trivia and more. |
||

