TIP OF THE DAY: Avoid Grill Toxins With Organic Grilling | The Nibble Webzine Of Food Adventures - The Nibble Webzine Of Food Adventures TIP OF THE DAY: Avoid Grill Toxins With Organic Grilling | The Nibble Webzine Of Food Adventures


THE NIBBLE BLOG: Products, Recipes & Trends In Specialty Foods


Also visit our main website, TheNibble.com.


TIP OF THE DAY: Avoid Grill Toxins With Organic Grilling

August 16th is National Bratwurst Day. Before you throw some brats on the grill, here are tips on organic grilling from Maria Rodale, CEO and Chairman of Rodale Inc., a publisher of health and wellness magazines, books, and digital content*.

Not surprisingly, she’s committed to organic living. This article is adapted from a larger article:

AN ORGANIC GUIDE TO GRILLING

Grilling in America needs an organic makeover—independence from exposure to conventional grilling toxins, says Maria. We need to apply that spirit of revolution to our health and the environment and take it organic every time we fire up the grill!

Sure, you can find throw a grass-fed, certified-organic steak or an Applegate Farms organic hot dog on the grill. But there’s more to organic grilling than just what you cook.

Organic grilling is a complete process that minimizes toxic chemicals from beginning to end, as it maximizes flavor and healthful benefits for you and the environment.

   
/home/content/p3pnexwpnas01_data02/07/2891007/html/wp content/uploads/hot dogs grill hillshirefarmsFB 230

Avoid toxic charcoal briquettes; use organic charcoal. Photo courtesy Hillshire Farms.

Here Maria demystifies the grilling process and detoxifies it as much as possible. Her tips are safe and simple.
 
*This article was originally published on June 24, 2015 on Maria’s Farm Country Kitchen blog.
 
STEP 1: USE ORGANIC GRILLING MATERIALS

You can use any grill; Maria uses a Big Green Egg charcoal grill with certified-organic charcoal. Big Green Egg sells organic charcoal, as do other companies.

Whatever the brand, always use charcoal that’s made from natural materials like wood (look for “lump charcoal,” bamboo or coconut). You can use wood logs instead of charcoal; just make sure you have time to let them burn down a bit first. Avoiding toxic briquettes is the most important organic choice you can make for the environment and for your health.

  • To start the grill, you will need a chimney starter, which lets you light the charcoal without poisonous lighter fluid. A chimney starter and organic charcoal solve most of your toxin problems.
  • Everything else you need: paper to stuff under the chimney, matches, organic food to grill, tongs and a silicone hot pad. Maria recommends tongs that are long, non-locking and without plastic parts.
  •  
    STEP 2: PREPARE THE GRILL

    Make sure your grill is in a safe place, all your materials are handy, and the grill is clean enough.

  • Never use a wire cleaning brush to clean your grill. Those little wire bits can break off and get stuck in your stomach. Instead, use a heavy-duty sponge, a wood grill scraper or a natural-fiber scrub brush.
  • When the grate is clean, rub it with some high smoke point oil on the grill—Maria likes coconut oil but canola, peanut, soybean, sunflower and others are fine—to keep your food from sticking.
  •  
    STEP 3: LIGHT THE FIRE

    First, remove the grill grate. Put a few pieces of crumbled dry paper (or one piece of newspaper) at the bottom of the chimney; then load the charcoal on top. Spread a bit of charcoal around the sides, too. Light the paper on fire underneath.

  • Keep checking to make sure that it’s burning hot enough. For example, in damp weather, it might take a few tries to get the paper burning hot enough to light the charcoal.
  • You will know if it’s caught fire when you see smoke coming out of the top of the chimney and/or feel the heat.
  •  

    /home/content/p3pnexwpnas01_data02/07/2891007/html/wp content/uploads/grilled shrimp thesmokedolive 230
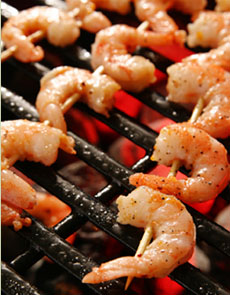
    Put some shrimp on the barbie… Photo courtesy The Smoked Olive (try their terrific smoked olive oil!).
     

    STEP 4: WAIT

    It will take 10 to 15 minutes for the charcoal to get hot enough. You’ll know it’s ready when you can see red coals glowing through the chimney holes.

  • During that time, make sure all your food is ready to be put on the grill.
  • When the fire is hot enough, grasp the handle of the chimney with a hot pad and dump the burning coals into the grill.
  • Remove the chimney, which will be burning hot, to a safe place, out of the reach of anyone (adults as well as children).

     
    STEP 5: GRILL!

    Put the grill grate back on the grill. It will need a few minutes to warm up, so don’t rush. Spread some oil on the grill to prevent sticking and add the food.

  • You can use aluminum foil if you want, but it’s not necessary. The important thing is to give the food the time it needs to cook properly.
  • Remove the food from the grill onto a clean platter and get ready to dig in.
  •  
    ADDITIONAL GRILLING SAFETY TIPS

  • Keep a squirt bottle or squirt gun handy in case the fire gets too hot. This is especially important if you are using wooden logs—they can get really hot. If they do, give the grill a squirt. Most natural or organic charcoal doesn’t get super-hot, unless you use lots of it.
  • Don’t put cooked meat on the same platter you used for raw meat without washing it first. That’s just good food safety.
  • Don’t get distracted. You can’t grill successfully while trying to get the rest of the meal ready. You need to keep an eye on the food or it can easily burn (or not cook fast enough). If you have no other hekp, make sure all of the other items on your list are ready before you start to grill.
  •   

    Please follow and like us:
    Pin Share


    Comments are closed.

    The Nibble Webzine Of Food Adventures
    RSS
    Follow by Email


    © Copyright 2005-2024 Lifestyle Direct, Inc. All rights reserved. All images are copyrighted to their respective owners.